Thursday’s
Class was all about Butterflies and the colour “Purple”!!!
And in attendance
we had Bev, Kay, Lizzy, and Marion.
It was the last Thursday of the school holidays, and my hubby took the day off to help out with the kiddies.
I have to
be honest, I had a meltdown at 12.15pm as our 2nd project was
completed and consisted of Vellum being sponged with Wisteria Wonder, Perfect
Plum and Elegant Eggplant.
I then
stamped with Elegant Eggplant the “Wildflower Meadow” stamp, and then embossed
with the “Wildflower Meadow” Embossing Folder.
My next step
was to punch some flowers using the Petite Petals punch in Elegant Eggplant.
I used a
Candy Dot Brad Bases and Pearls, and the peace-de-la-resiance was a spritz of “Smooch
Spritz” … and the whole card buckled and the colours ran!!!!
I was devastated,
so had to quickly re-hash a card I did back in December, and from my Post
entitled “3 Sisters, 3 Cards … “.
Project #1
Our first
project this week was a 8”x8” card featuring the Swallowtail stamp, the
butterfly has a base of Naturals White cardstock, embossed in Black, and
coloured using the Blender Pens in shades of Purples of Wisteria Wonder, Perfect
Plum and Elegant Eggplant, and the accent colour was Rich Razzleberry. The
butterfly is then fussy-cut.
The Crumb
Cake cardstock is stamped using the “Hardwood” stamp in Sahara Sand.
Wisteria
Wonder cardstock is embossed with the “Honeycomb” Embossing Folder, then hand-torn.
A second
Butterfly was cut in Basic Black to form the shadow.
Finally
the coloured Swallowtail Butterfly is added, adhered down the middle of the Butterfly
with strong tape or glue.
The sentiment
is StazOn Black on Rich Razzleberry, layered on Basic Black cardstock, Burlap, and
Victoria Crochet Trim.
The
flowers are punched using the Pansy Punch, and then crimped 8 times to break the
cardstock fibres down, then the flowers are split, so 3 flowers become 6. The
flowers are braded with Candy Dot Brad Bases and a Pearl along with a Petite
Petals flower punched the retired but available on Clearance Rack “First Edition Specialty Designer Series Paper”.
The card is anchored in the corner
with a Candy Dot in Rich Razzleberry.
The card
is then spritzed with “Smooch Spritz” – and no … the card did not run!!!
The peace-de-la-resiance
is the Crystal Effects is used on the body of the butterfly and on the accent
colour on the wings.
On the inside of the card, in
Wisteria Wonder my favourite “Very Vintage” wheel is used, along with punched
flowers in Rich Razzleberry
and Pearls.
The
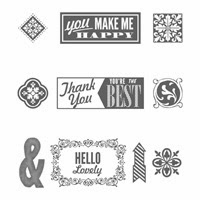
sentiment is from the “Hello, Lovely” stamp set, and is first stamped in
Wisteria Wonder, then the words “Thank You You’re The Best is stamped in
Elegant Eggplant, then fussy-cut and layered on Dimensionals.
Phew …
card done!
Project #2
The second
card, is also in shades of Purple, this time in Wisteria Wonder and Elegant
Eggplant, and has a card-base of Naturals White.
First
stamp the Swallowtail butterfly in Wisteria Wonder, then emboss 2/3 of the card
with the Decorative Dots Embossing Folder, which will be available in the new
Catalogue!!!.
Layer
flowers stamped from the Mixed Bunch (and punched with the Blossom Punch} and
Flower Shop {and Pansy Punch} stamp sets in Wisteria Wonder and Elegant
Eggplant.
Brad with
a Cady Dot Brad Base and add a Pearl.
Punch a
couple of leaves with the Bird Builder Punch in Wisteria Wonder.
The
sentiment ”Happy BIG Day” is from the Chalk Talk stamp set and matching
framelits
On the
inside of the card using Stampin’ Markers in Elegant Eggplant and Early
Espresso, colour the words “Make A Wish” from the “Perfect Pennants” stamp set.
And finally
add a couple of dots and stripes, also from the “Perfect Pennants” stamp set in
shades of Wisteria Wonder and Elegant Eggplant.
Wah-lah …
Swallowtail Purple Cards done!
“First Edition Specialty Designer Series Paper”,
Retired but available on the Clearance Rack
“Chalk Talk” Stamp Set
"Hardwood” Background Stamp
"Hello, Lovely” Stamp Set
"Flower Shop” Stamp Set
“Mixed Bunch” Stamp Set
“Perfect Pennants” Stamp Set
“Swallowtail” Stamp
Recipe Ingredient List
Stamp Sets: “Chalk Talk”, Hardwood”, Hello, Lovely”, Flower Shop”, “Mixed
Bunch”, “Perfect Pennants” and “Swallowtail”
Ink: Black StazOn, Elegant Eggplant, Perfect
Plum, Rich Razzleberry,
Sahara Sand, Wisteria Wonder, and Stampin’ Markers, Elegant Eggplant and Early
Espresso and Versamark
Cardstock: Basic Black, Crumb Cake, Naturals White, Rich Razzleberry, Wisteria
Wonder and
retired but available on the Clearance Rack “First Edition Specialty Designer Series Paper”.
Punches: “Bird Builder”,
“Blossom”, “Corner”, “Pansy”, “Petite Petals”
Embossing Folders:
Decorative Dots and Honeycomb
Framelits/Dies: “Chalk Talk” Framelits
Xtras:
Black Embossing Powder, Blender Pens, Burlap, Candy Dot Brad Bases, Candy Dots,
Crystal Effects, Dimensionals, Pearl Basic Jewels, Victoria Crochet Trim,
Special Tools: Big Shot,
Big Shot Magnetic Platform, Crimper, Heat Tool, Stampin’ Scrub and Stampin’ Cleaner, StazOn Cleaner, Stampin’
Trimmer


