Cotton Butterfly

Free background from VintageMadeForYou

Wednesday 29 October 2014

Weekly Deals For Tuesday 30.10.2014


The Weekly Deals are up …

Dotted Scallop Ribbon  Border Punch  – check!
Project Life Cards and Labels Framelits – check!
Word Bubbles Framelits – check!
Perfect Print Numbers  Bigz Die – check!
Silver Basic Metal Buttons – check!

Oh my goodness, what do I not own?!!!!

I have incorporated some of the Weekly Deals in tomorrow’s {I mean today’s!} demonstrations.
On my Wish List are the 1/16”Circle Handheld Punch and the Natural 7/8” Chevon Ribbon,
And also I will need to replace the buttons we use tomorrow {again I mean today!}, so I will be purchasing some more of the Silver Basic Metal Buttons

Thanks for taking the time to stop by, and if you would like to make a Stampin’ Up! purchase online, please head on over  to my Stampin’ Up! website.

Happy craftin’,
Kathe.


#CreateWithKathe #JorjaRoseFiles


Monday 27 October 2014

“Create With Kathe” For Thursday 23rd October 2014


Wellll … actually that should be {not well and …} “Create With Kathe” for Tuesday AND Thursday, as I had 3 Classes last week!
I was so thankful for the Tuesday Class, as it meant I had designed and made up Kits ready for Tuesday AND Thursday, as my son broke his arm on the Wednesday, on the way to school, which meant I spent the whole day at the Hospital with him, getting his arm manipulated and realigned, before being put in plaster past his elbow – poor kid!

We made two projects last week, the first a textured card in tones of Soft Suede, Crumb Cake and Naturals White, with the cute message “A Little Birdie Told Me” from the Hostess Stamp Set “Hello Love”.
The second project was a pop-up Christmas card, featuring a Snow Glow and the stamp sets “Holiday Home”, “White Christmas” and “Wondrous Wreath”.   This card is a case of a sketch by Paula Dobson from her Facebook page "Stampinantics"…

Project 1 Textured Card W/ “Hello Love” Stamp Set


This card could be used a congratulations card for a new job, new house, new baby, new relationship etc, as the sentiment “A Little Birdie Told Me” can lead towards any occasion.
The cardbase for this card is Soft Suede {with the corners rounded with the Project Life Corner Punch}, with layers of Crumb Cake and Naturals White.
A mesh layer of construction tape is placed on the card horizontally, then the Crumb Cake layer which is cut using the “Top Note” die.
A second Top Note is cut in Naturals White and the stitched edge is trimmed, including the horizontal points, so that the Burlap and Naturals Chevon Ribbon will lay flat.


Half a “Tea Lace Paper Doily” is adhered to the Naturals White Top Note, then the Burlap, which has been cut with the “Large Scallop” Die, then the Naturals Chevron Ribbon are adhered with orange Sticky Strip, which is xtra strong and perfect for adhering ribbon.
The Naturals White layer is then adhered with Dimensionals to the Crumb Cake layer.


The bird and sentient “A Little Birdie Told Me” are from the “Hello Love” Stamp Set and are stamped in Early Espresso on Naturals White, the outline for the sentiment is stamped in Soft Suede.
The bird and sentiment are then fussy cut, sponged with Crumb Cake and adhered with the Dimensionals.
The finishing touch is a Candy Dot “anchor” made form Dazzling Diamonds Glimmer Paper, that has been punched with the Crop-A-Dile, and adhered with a Glue Dot.


For the card insert, Naturals White cardstock has been corner rounder, and negative detail created by using the “Hearts Border” Punch.
Soft Suede cardstock I then stamped with a feather form the “Four Feathers” stamp set in Versamark, and heat set with Gold Stampin’ Emboss Powder.
The “Bird Builder” Punch is then used to punch a bird with the feather lying along the bottom of the bird.
The finishing touch is the anchor, which is created by making a negative detail by punching a small hole with the Crop-A-Dile, so that the Soft Suede cardstock shows through the hole. 
Wah-lah ... Textured Card W/ "Hello Love" Stamp Set done! 


Project 2 Pop-Up Christmas Card With Snow Globe


The idea for the card came from a photo of cards that I spotted by Paula Dobson from “Stampinantics”, on her Facebook page, I changed it up more than a little, adding the pop-up on the card insert, and changing the Snow Globe scene.


The cardbase for this card is Whisper White, with an overlay of Whisper White. The overlay has been scored along the outer edges with the Simply Scored Scoring Tool.
The sentiment “Happy Wonderful Christmas” is from the “Wondrous Wreath” stamp set, and coloured using Stampin’ Write Makers in Early Espresso and Real Red.
The Snow Globe is stamped on a separate piece of Whisper White cardstock with Black StazOn, and coloured using a Sponge Dauber in Soft Sky, and Stampin’ Write Markers in Crumb Cake, Pumpkin Pie and Real Red.


I made up several samples so the ladies could see by just changing the position of the 2 ½” Circle Punch, it can change the whole scene of the Snow Globe.
Position the 2 ½” Circle Punch, and punch the scene that you prefer.
Dazzling Diamonds Stampin’ Glitter is added for effect, along the tree trunks, the snow, and on the snow man/person.
A small snowflake from the “Frosted Sequins” is added before the Window Sheet is adhered with Crystal Effects.
Adding the Window Sheet is the very last thing to be done, once the card has been fully completed, as the card needs to dry flat, as the Window Sheet can move.
The base of the Snow Globe is created by punching 2x “Word Window” in Crumb Cake.
A Basic Metal Button or Vintage Faceted Designer Button has been added to the bottom corner of the card to anchor it, and is tied with either White Bakers Twine or Early Espresso Bakers Twine.


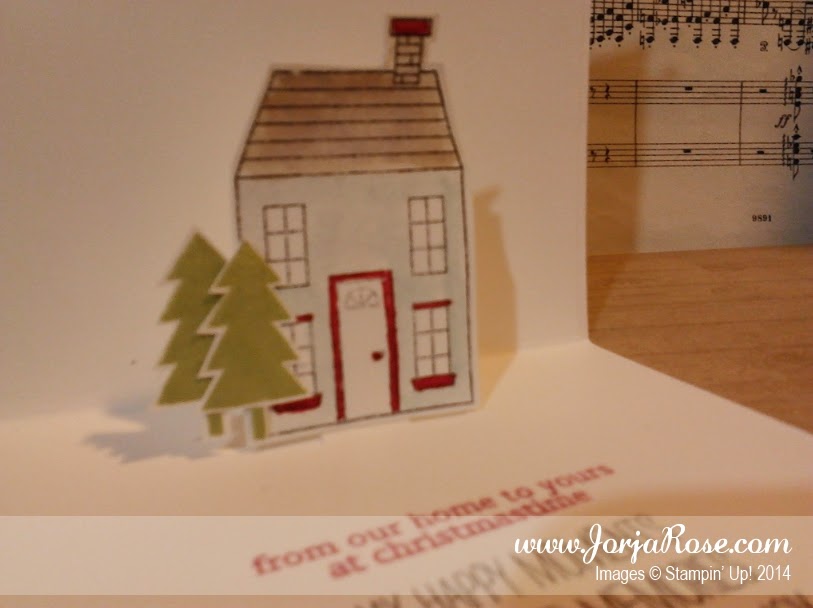
The card insert is a full lining of Whisper White, with the pop-out being created by punching 2x “Word Window” punches along the crease line.
A small house from the “Holiday Home” stamp set has been stamped in StazOn Black, and coloured using Aqua Painters with Soft Sky and Crumb Cake, and the Real Red Stampin’ Marker, and cut using the “Homemade Holiday” Framelits.
The little trees are also from the “Holiday Home” stamp set, and stamped in Pear Pizzazz and fussy cut.
The sentiment “from our home to yours at christmastime” is from the “Holiday Home” stamp set and stamped in Real Red.
The second sentiment “May happy moments & cherished memories surround you with joy this season” is from the “Wondrous Wreath” stamp set and is stamped in Early Espresso.


A little snow man/person is stamped at the lower right hand corner, and is coloured with Stampin’ Makers in Pumpkin Pie and Real Red, which anchors the card nicely.
Wah-lah … Pop-Up Christmas Card With Snow Globe done!

And here here are my other two samples that I made up ...


Thanks for taking the time to stop by, and if you would like to make a Stampin’ Up! purchase online, please head on over  to my Stampin’ Up! website.

Happy craftin’,
Kathe.

p.s. gotta say ... "White Christmas" is still my fav Christmas/Holiday stamp set for this year!

#CreateWithKathe #JorjaRoseFiles


“Four Feathers” Stamp set and matching "Feathers" Framelits


“Hello Love” Hostess Stamp Set


“Holiday Home” Stamp Set


“White Christmas” Stamp Set


“Wondrous Wreath” Stamp Set

Recipe Ingredient List
Stamp Sets : “Four Feathers”, “Hello Love”, “Holiday Home”, “White Christmas” and “Wondrous Wreath”
Ink : Black StazOn, Early Espresso, Pear Pizzazz , Real Red, Soft Sky, Soft Suede, Versamark
Stampin’ Markers : Crumb Cake, Early Espresso, Pumpkin Pie and Real Red
Cardstock :  Crumb Cake, Glimmer Paper in Dazzling Diamonds, Naturals White, Soft Suede, Whisper White, Window Sheets,
Punches : “2 ½’ Circle”, “Bird Builder”, “Hearts Border”, “Project Life Corner Rounder”,  “Word Window”
Framelits/Dies : Homemade Holiday, Large Scallop, Top Note, Word Bubble,
Ribbons : Bakers Twine in White and Early Espresso, Burlap, Natural Chevron
Xtras : Basic Metal Buttons, Construction Tape, Glue Dots, Dimensionals, Frosted Sequins, Sponge Dauber, Stampin’ Emboss Powder in Gold, Tea Lace Paper Doily, Vintage Designer Button,

Special Tools : Crop-A-Dile, Heat Tool, Paper Trimmer, Simply Scored Scoring Tool, Stampin’ Scrub and Stampin’ Cleaner, Stampin Trimmer,

Wednesday 22 October 2014

“Create With Kathe” For Thursday 16th October 2014


This weeks “Create With Kathe” Craft Class, we made a whopping 3 projects, starting with the Mini Album first.
The second project was a cute little “Curvy Keepsake Box”, and the third and quick and easy Christmas card, featuring the Bundle "Festival Of Trees" …

Project 1 Mini Album


For the sample, I featured the “All Is Calm” Designer Series Paper, and for my other/xtra samples I used the “Everyday Enchantment” DSP.


Take a 12” x 12” piece of Designer Series Paper {double sided paper}, and Score at 3”, 6” and 9”.
Turn  90 degrees and again score at 3”, 6”, 9”
This is a breeze , by utilizing my Simply Scored Scoring Tool.
Cut along the lines as per diagram ...


Fold concertina style {over under over under}, continuing around the corners.
Adhere the loose tops and bottoms with 3mm double sided tape or glue, to form the pockets.


Use the “Postage Stamp” Punch to punch the openings {of the pockets} for the Tag{s}, which have been punched using the “Scallop Tag Topper” and “Project Life Corner Rounder” Punches, then stamped with the “Petite Petals” stamp set in Coastal Cabana.


The ribbon closure is made with Venetian Crochet Trim or Soft Sky 1/2" Seam Binding Ribbon, and adhered to the Mini Album before the cover is adhered.


The cover is made with 2x 3 ½ “ pieces of cardstock {I used the backing/packaging from the DSP packs}, and 2x 4” pieces of DSP.
Adhere the 3 ½ “ cardstock to the centre of the 4” DSP, mitre corners, and fold DSP over and adhere.


The flower is made by using the “Blossom” Punch, x4 in Pool Party, and then crimped x8 in the Paper Crimper. The fibres of the cardstock are then broken down, so you can split each Blossom into 2, petal by petal {take it slowly!} = 8 Blossoms.
The Blossoms are then placed furry side up, adhered with a Mini Brad, then a Very Vintage Designer Button is threaded with Bakers Twine, a bow tied, and adhered to the Blossom.


Now adhere the Blossom to the Mini Album, and  …
Wah-Lah … Mimi Album done!

Project 2 “Curvy Keepsake Box”


Continuing the theme with the Pool Party cardstock, we cut 2x “Curvy Keepsake Box” Thinlits Dies, and on two opposite sides, embossed with the “Lovely Lace” Textured Impressions Embossing Folder, a small Pearl Basic Jewel is adhered to the centre of each of the embossed sides.
Once the box is assembled we added some Tags in Pool Party cardstock, 2x with the Tag Die included in this pack, one of which was embossed with the “Lovely Lace” TIEF, and a small Pearl Basic Jewel + 2 x feathers from the “Feathers” framelits, 1 in Pool Party and 1 in Vellum.
The word "love" is from the "Good Greetings" stamp set, and is actually the sentiment "i love you", but we have just coloured the word "love" with the Early Espresso Stampin Marker.
The tags/Feathers are strung together and tied with Bakers Twine.
Wah-Lah … “Curvy Keepsake Box” done!

Project 3 “Festival Of Trees” Christmas Card – which I showcased in the “Creative Inkers Christmas Blog Hop”

I chose this Bundle as it is very affordable {$59.25}, and can be used in many different ways.   For more ideas you can check out Pinterest.


I have made up 4 samples, each different from the others.

In all four cards I featured a small Candy Dot as an anchor, created using the Crop-A-Dile and Glimmer Paper in “Dazzling Diamonds”, and adhered with Glue Dot.

The card Base is Pool Party, with a overlay of Crumb Cake.
The sentiment “Merry Christmas” is from the stamp set “Endless Wishes” and stamped in Tempting Turquoise.
The Star Punch from the “Itty Bitty Accents Punch Pack” is used to punch the Star from Glimmer Paper in “Dazzling Diamonds”.


First sample features the Tree, with no embellishments/decorations on the Tree.


Second sample features the Tree with a Bucket, with no embellishments/decorations on the Tree.


Third sample features the Tree with “Dazzling Diamonds” Candy Dot embellishments/decorations.


Fourth sample features the Tree with a Bucket, and the Tree with “Dazzling Diamonds” Candy Dot embellishments/decorations.


For the card insert, which is Naturals White, the sentiment “A Merry Little Wish… For Lots Of Joy At Christmas” is from the “Festival Of Trees” stamp set and stamped in Early Espresso,
 I used the “Confetti Stars” Punch as a border, and adhered the negative detail of the Tree in Crumb Cake.


In the second version, I have added the Bucket.
The finishing touch is the Star at the top of Tree.

The “Tree” Punch {below} is very versatile, as it can also be used to make small trees as per the photo below.


Wah-Lah ... “Festival Of Trees” Christmas Card done!

Thursday’s evening Class, we also had a surprise birthday party for one of our crafters Jill, and I was so overwhelmed to receive this gorgeous handmade stitched thank card from Jill yesterday …


By Jill Hosking

Thanks for taking the time to stop by, and if you would like to make a Stampin’ Up! purchase online, please head on over  to my Stampin’ Up! website.

Happy craftin’,
Kathe.

#CreateWithKathe #JorjaRoseFiles

Recipe Ingredient List
Stamp Sets : “Endless Wishes”, “Festival Of Trees”, "Good Greetings", “Petite Petals”
Ink : Coastal Cabana, Early Espresso, Tempting Turquoise
Stampin' Write Markers : Early Espresso
Cardstock :  Crumb Cake, Designer Series Paper in “All Is Calm”, Glimmer Paper in Dazzling Diamonds, Naturals White, Pool Party, Vellum
Punches : “Blossom”, “Confetti Stars” Star from the “Itty Bitty Accents Punch Pack”, “Postage Stamp”, “Project Life Corner Rounder”, “Scallop Tag Topper”, “Tree”
Framelits/Dies : "Curvy Keepsake Box” Thinlits Dies, “Feathers” Framelits
Textured Impressions Embossing Folders : “Lovely Lace”
Ribbons : Soft Sky 1/2" Seam Binding Ribbon, Venetian Crochet Trim, White Bakers Twine
Xtras : Glue Dots, Dimensionals, Mini Brads, Pearl Basic Jewel, Very Vintage Designer Button,

Special Tools : Crop-A-Dile, Paper Trimmer, Simply Scored Scoring Tool, Stampin’ Scrub and Stampin’ Cleaner, Stampin Trimmer


Weekly Deals: For Wednesday 22nd October 2014


The Weekly Deals are up …

This week ‘tis all about Textured Impressions Embossing Folders, with the “Ampersand” and “Zig Zag” makin’ an appearance, tick tick, got both!

The “Jumbo Sticky Rounds” sounds interesting … strong adhesive for creating rosettes, flowers, and more using paper, ribbon, or fabric. Cut and peel sticky round from sheet; make sure outer layer of ribbon hangs over outer edge of sticky round so no adhesive is visible. No drying time required. Acid free!
Likin’ the sound of that!

And the “Little Buddy Birthday” stamp set looks so cute, a great stamp set for making children’s birthday cards with!

Thanks for taking the time to stop by, and if you would like to make a Stampin’ Up! purchase online, please head on over  to my Stampin’ Up! website.

Happy craftin’,
Kathe.


#CreateWithKathe #JorjaRoseFiles


Extra Special Christmas Supplement


Extra Special Christmas Supplement ...

So excited to announce that Stampin’ Up! have released a mini {another} Christmas brochure called “Extra Special Christmas” Supplement, and it’s full of Christmas ideas, and as I order weekly, you will still have time to make Christmas cards to get in the post for those family and friends living afar.


Woop woop, my pre-order arrived yesterday and I have my hands on the new Simply Created Kit “Many Merry Stars”, and the coordinating stamp set “Many Merry Stars” that matches back with the Stars Framelits.


“Many Merry Stars” Photopolymer Stamp Set


Simply Created Kit “Many Merry Stars”


Simply Created Kit “Many Merry Stars”


Simply Created Kit “Many Merry Stars”


NOW is the chance to get affordable deals on our unique products.
With Christmas right around the corner, it's a perfect chance to make cards!

Thanks for taking the time to stop by, and if you would like to make a Stampin’ Up! purchase online, please head on over  to my Stampin’ Up! website.

Happy craftin’
Kathe.

#CreateWithKathe #JorjaRoseFiles


Related Posts Plugin for WordPress, Blogger...
Pin It
Blogger Wordpress Gadgets