Cotton Butterfly

Free background from VintageMadeForYou
Showing posts with label Labels Collection. Show all posts

Sunday, 14 September 2014

“Create With Kathe” For Thursday 11th September 2014


Soooo how many chocolate biscuits does it take to create a Class?
I munched through half a pack during the night, and finished the Class prep at 4am!!


At this weeks “Create With Kathe” Class, we had an xtra special guest Margaret, so Class numbers on Thursday swelled to 7 for the afternoon Class!
This week we made a cute FlowerPot Card, + a card featuring the new “Little Letters” Thinlits that spelt out the word “BIRTHDAY” …


Project 1 FlowerPot Card


The card Base Is Crumb Cake, and the Pot is embossed with the “Decorative Dots” and “Fancy Fan” Embossing Folders.
The Cardstock and Silky Taffeta Ribbon is in an accent colour of Lost Lagoon, which is a nice contrast against the Crumb Cake.
The words “thankful for you” are from the “Good Greetings” stamp set, and are embossed in White.   The sentiment banner is cut using the “Project Life Cards and Labels” Framelits, with 2 rows of Pearls added, which frames the sentiment nicely.
The Card Insert slides out of the Pot, and is Whisper White, backed on to Crumb Cake.


The flowers are from the “Flower Shop” stamp set, and are stamped with Versamark on to Pool Party, and then embossed in White, they are then hand coloured using the Aqua Painters with Coastal Cabana and Tempting Turquoise Inks.   Finally they are punched using the Pansy Punch, and then 4 small Pearls added to the centre of each flower.
Leaves in Garden Green are cut using the Flower Frenzy Bigz die, and adhered to the back of the card insert, with the flowers arranged to overlap on to the Pot.
On the card Insert, the background stamp from the “For All Things” stamp set, is in a wash of colour with Coastal Cabana.   The sentiment “for someone who makes others so happy!” is from the “Petite Pairs” stamp set and stamped in Tempting Turquoise.
A Crystal Effect Dot coloured in Coastal Cabana in the final touch, and anchors the project.

Wah-lah … FlowerPot Card done!

Project 2 “BIRTHDAY” Card


I have been wanting to try this technique out since I saw it on {photos from} the display boards from the Stampin’ Up! Convention.
The card base for this card is Soft Suede, and the word “BIRTHDAY” {from the “Little Letters” Thinlits} is lined up and Washi Tape used to adhere it to the card base. The Big Shot is used to cut the letters, but not all the way to the base, the words then pop up … such fun!
The word “DAY” is cut from scraps of Blushing Bride cardstock, and adhered to the card, to make the word “BIRTHDAY” really pop!
The card base is then embossed with the “Large Polka Dot” Embossing Folder.
Venetian Crochet Trim is then added to the centre of the card, and wrapped around the front panel of the card, and adhered under the Labels.
The “Labels Collection” Framelits are used to cut labels in graduating sizes, in Crumb Cake, Blushing Bride and Naturals White.
The word ”Celebrate You!” is from the “Cupcake Party” stamp set, and is stamped in Early Espresso.
A Cupcake from the same stamp set, is stamped in Early Espresso and Strawberry Slush, on Blushing Bride cardstock, and then punched with the ”Cupcake Builder” Punch.
The top of the Cupcake has been adhered with a Dimensional.
Stampin’ Glitter in Dazzling Diamonds is added to the top of the Cupcake.
A Crystal Effects Dot in Strawberry Slush is adhered with a Glue Dot, and is on the bottom right-hand corner, and anchors the project.
For the Card Insert, Naturals White cardstock has had the corners rounded with the “Project Life Corner” Punch.


The sentiment “Today calls for something pink with sprinkles on top!” is from the “Remembering Your Birthday” stamp set, and is coloured with the Early Espresso and Strawberry Slush Stampin’ Markers.
Another Cupcake from the “Cupcake Party” stamp set is stamped on Blushing Bride cardstock, with Early Espresso and Strawberry Slush Inks.
The final touch being the Stampin’ Glitter in Dazzling Diamonds, on the top of the Cupcake.
Bev's Interpretation ....


Wah-lah … BIRTHDAY Card done! 

Mmmmmm … my mind is swirling with ideas for next weeks Class, which I will be running 1pm>3pm and again 7pm>9pm, and taking bookings now!


“Cupcake Party” Stamp Set


“Flower Shop” Stamp Set


"For All Things” Stamp Set


“Good Greetings” Hostess Stamp Set


“Petite Pairs” Stamp Set


“Remembering Your Birthday” Stamp Set


“Flower Frenzy Bigz” Die


“Labels Collection” Framelits


“Little Letters” Thinlits


“Project Life Cards and Labels” Framelits

Recipe Ingredient List
Stamp Sets : “Cupcake Party”, “Flower Shop”, “For All Things”, “Good Greetings”, “Petite Pairs”, “Remembering Your Birthday”
Ink : Coastal Cabana, Early Espresso, Strawberry Slush, Tempting Turquoise, Versamark
Blendabilities : Coastal Cabana, Strawberry Slush
Stampin’ Markers : Early Espresso, Strawberry Slush
Cardstock : Blushing Bride, Crumb Cake, Garden Green, Lost Lagoon, Naturals White, Pool Party, Soft Suede, Whisper White
Punches : Cupcake Builder, Pansy, Project Life Corner and for Bev's Word Window
Framelits/Dies/Thinlits : “Flower Frenzy Bigz” die, “Labels Collection” Framelits, “Little Letters” Thinlits, “Project Life Cards and Labels” Framelits,
Embossing Folders : “Decorative Dots”, “Fancy Fan”, “Large Polka Dot”
Xtras : Aqua Painters, Crystal Effect Dots, Embossing Powder in White, Glue Dots, Pearl Basic Jewels, in Lost Lagoon, Silky Taffeta Ribbon Stampin’ Glitter in Dazzling Diamonds, Venetian Crochet Trim, Washi Tape

Special Tools : Big Shot, Heat Tool, Magnetic Platform, Stampin’ Scrub and Stampin’ Cleaner, Stampin Trimmer

#CreateWithKathe #JorjaRoseFiles


Wednesday, 13 August 2014

“Create With Kathe” For Thursday 7th August 2014


This week was all about the gorgeous stamp set “Kinda Eclectic”, this is my favourite stamp set from the new Catty!
I like to show the ladies how they can utilise one Stampin’ Up! product, and use it many different ways.
This week we made two greeting cards, which look completely different from each other.

The first card is a Shaker Window Card, and is case of a lovely layout by France Martin, however I changed many of the details, but kept the window {different shape though}, shaker and stamp set the same.
The second card made is all about the “inchies” and layering, and was my first time using Naturals Cream cardstock {I usually use Naturals white as my card-bases}.

As we had a couple of my favourite ladies absent this week, I made their cards up for them.
When I went to start the remake, I discovered that quite by accident my sample card had gone home with one of the other ladies, so ended up making another 3 Shaker Window Cards – phew!

Project 1 ”Shaker Window Card
 
 
5 ¾“ x 8 ¼”               Bermuda Bay {Card-Base}, A5
5 5/8” x 3 ¾”            Naturals White x2
5 5/8” x 3 ¾”            Pool Party
5 5/8” x 3 ¾”            Acetate
3 ½” x 4 ½”               Coastal Cabana {Window Border}
3 ½“ x 3 ½“               Pool Party {Insert Heart}
Xtra                            Naturals White for the Butterflies

This card is all about tone-on-tone, and features 3 colours that work so well together, Pool Party, Coastal Cabana and Bermuda Bay.
The card-base is Bermuda Bay, with the lining/insert in Naturals White.
On a piece of Naturals White, and using Versamark and Gold Embossing Powder, stamp and heat emboss the Sun from the “Kinda Eclectic” stamp set. Add a small circle {3/4”} of “Champagne Glimmer” cardstock for the centre of the Sun. Then Stamp the leafs in Bermuda Bay ink.
Make a packet for the Shaker using a Cellophane Bag and add “In Color Sequins Assortment” to the packet. Seal and place on top of the Naturals White Cardstock.
Using the Costal Cabana cardstock {3 ½” x 4 ½”}, and using the Labels Collection Framelits, cut a “Label”, then using the next size down, cut another label inside for the first, to leave a border. Discard the Label and keep the border.
Using the same smaller Framelit {as used above}, cut a hole in the Pool Party Cardstock {5 5/8” x 3 ¾”}.
Stamp the leaves in Coastal Cabana around the cardstock.
Through practise {and trial and error!} I discovered it is better to cut the hole {Label} first, and leave a clean “Label” to be used in another project, rather than stamp the cardstock first, and then cut the Label, as this left leaves all over my spare Label!
On the Acetate, first use the Emboss Buddy to get rid of fingerprints etc, then stamp with White StazOn the words “A little kindness goes a long way” from the “Kinda Eclectic” Stamp set.
On the xtra Naturals White cardstock, stamp 4 large butterflies in Bermuda Bay, and 4 small butterflies in Costal Cabana. Then use the Elegant Butterfly and Bitty Butterfly Punches to punch out the butterflies.
Layer the butterflies, and add 3 small Pearls to the middle of each butterfly.
Now it’s all about the assembly for the front of the card.
You may have to trim the underlying layers to fit.
Adhere as follows, Bermuda Bay {card-base}, Naturals White, Cellophane Packet, Acetate, Pool Party, Coastal Cabana window frame.
All of the layers are adhered by tape {or glue if you’re a glue crafter!}, except for the layer of Pool Party, which adhered with Dimensionals.
Add 3 butterflies to the side of the card at varying angles.


For the card insert, take the Naturals White cardstock and using the “Hearts Border” Punch, punch the top, this leaves negative detail, which when placed over the Bermuda Bay cardstock, you can see the colour popping through the hearts. Also corner the Naturals White insert with the “Corner Rounder” Punch
Stamp the words “Thank you from the bottom of my heart” from the “From My Heart” stamp set, in Bermuda Bay on to Pool Party.
Use the “Hearts Collection” Framelits to cut a heart, and add a Pearl to the little swirls at the top and bottom of the heart.
Adhere heart to the Naturals White insert, and add the 4th butterfly to the bottom corner.
And finally, adhere the Naturals White insert to the Bermuda Bay card-base.
And as Frenchie would  say … “Wah-lah” Shaker Window card done!

Project 1 ”Inchies Card
 
 
5 ¾“ x 8 ¼”               Soft Suede {Card-Base}, A5
5 5/8” x 3 ¾”            Naturals Cream x2
Xtra                            Soft Suede for the Postage Stamps
Xtra                            Naturals Cream for the Butterflies and 1” Square s
1” x 1”                        Champaign Glimmer Paper

Compared with the above card, this was my quick and easy project.
On Naturals Cream cardstock {5 5/8” x 3 ¾”} offset the corners, by punching the opposite corners with the Corner Rounder Punch.
Add a Candy Dot Brad Base and Pearl to the bottom right corner.
Stamp the words “A little kindness goes a long way” from the “Kinda Eclectic” Stamp set, in Soft Suede, and adhere to the card-base with tape {or glue}.
Punch 4 postage stamps from the Soft Suede cardstock, using the “Postage Stamp” Punch.
On Naturals Cream cardstock, stamp the leafs in Soft Suede, 2 large butterflies in Soft Suede and 2 small butterflies in Crumb Cake {all from the “Kinda Eclectic” Stamp set}.
Using the “1” Square”, the “Elegant Butterfly” and “Bitty Butterfly” Punches, punch 2 x leafs, the butterflies, and well as the “Champagne Glimmer” Paper.
Prepare the “inchies” by layering the 1” squares with Dimensionals on to the Postage Stamps.
With the butterfly, layer together, and then add a strand of Linen Thread for the antennae. Add a Dimensional and layer on to the final Postage Stamp.
Place the Postage Stamps on to the Naturals Cream cardstock, and then tape {or glue} down, ensuring that they are all evenly spaced, and straight!


For the card insert, as above, take the Naturals Cream cardstock and using the “Hearts Border” Punch, punch the top, this leaves negative detail, which when placed over the Soft Suede cardstock; you can see the colour popping through the hearts. Also off-set the corners the Naturals Cream insert with the “Corner Rounder” Punch to match the front of the card.
Stamp the banner dots in Crumb Cake along the bottom of the cardstock.
Add the second butterfly {antennae include!} to the bottom right corner.
Adhere the Naturals Cream insert to the card-base using tape {or glue}.
Wah-lah Inchies Card done!

AND today I unpacked my Christmas pre-order …


Can’t wait to try out these goodies …
Stamp sets: "Festival Of Trees", "For All Things", "Four Feathers", “Holiday Home”
Framelits: “Feathers”, “Homemade Holiday”, Card Thinlits Dies "Snowflake"
Punch: “Tree”
AND my freebie Hostess stamp set "Good Greetings".
Ahhhh … I’m in heaven!

Recipe Ingredient List
Stamp Sets: “From My Heart”, “Kinda Eclectic”
Ink:  Bermuda Bay, Coastal Cabana, Crumb Cake, Soft Suede, Versamark, White StazOn
Cardstock: Bermuda Bay, Champagne Glimmer Paper, Coastal Cabana, Naturals Cream, Naturals White, Pool Party, Soft Suede
Punches: ¾” Circle, 1” Square, Bitty Butterfly, Corner, Elegant Butterfly, Hearts Border, Postage Stamp
Framelits/Dies: “Hearts Collection”, “Labels Collection”
Xtras: Acetate, Basic Pearl Jewels, Candy Dot Brad Bases, Cellophane Bags, Dimensionals, Gold Embossing Powder, In Color Sequins Assortment, Linen Thread

Special Tools: Big Shot, Heat Tool, Magnetic Platform, Stampin’ Scrub and Stampin’ Cleaner, Stampin’ Trimmer, StazOn Cleaner


Wednesday, 6 November 2013

Card Off With Jen: Noah’s Ark Double Slider Card


Check out these adorable Double Slider Cards that I made with Jen.
The Apprentice has well and truly out-done the Tutor this time!!!

Our theme for this challenge was “Noah’s Ark”, a Double Slider Card AND using the stamp set “Zoo Babies”.

This idea is case’d from a Pin I found on Pinterest by Michelle Last

Our Ark’s took the most time (1 ½ hours) to make, and even then I was not completely happy with mine!

Watch this space though, as I will endeavour to make my Ark a lot better in the coming months, as I gear up to teach this card at my local church craft class “Women Connecting”.

To make the waves/sea I tore my cardstock, whereas Jen freehand cut hers with the Stampin’ Up! Paper Snips.

Yet again, although we both had the same theme and materials to work from, and our projects turned out completely different!

 “Noah’s Ark” Double Slider Card by Kathe Oldham {above}
 
“Noah’s Ark” Double Slider Card by Jen Hassloch {above}

 
“Noah’s Ark” Double Slider Card by Kathe {top card} and Jen {bottom card}

“Noah’s Ark” Double Slider Card  {extended}
by Kathe {top card} and Jen {bottom card}

Stamp Sets: “Zoo Babies”, “Petite Pairs” and “Chalk Talk”
Ink: Pistachio Pudding, Basic Gray, Black Staz On, and Watercolour Pencils
Punches: Boho Blossoms
Framelits: Labels Collection
Embossing Folder: Woodgrain

Special Tools: Big Shot, Candy Dots, Dimensionals, DSP "Beau Chateau" (My Digital Studio download), DSP Paper Stack “Festival Of Prints” (My Digital Studio download), Ribbon Chevron “Crushed Curry”,  and Ribbon Stitched Grosgrain “Early Espresso”

Wednesday, 23 October 2013

A Fancy Fold Card With A Halloween Twist

♥ this Halloween card, that can also be adapted to any theme.
I used the Black Embossing Powder to really make my stamping stand out.
Did you notice the {dangling in the centre of card} flattened Beer Bottle Top/Soda Pop Top? ... Just run it through your Big Shot/Cuttlebug (in other words squash it!)and you can add pictures to the insert.
On this occasion I have used my Crop-A-Dile to create a hole and threaded some ribbon through and tied it off on the card.
In the past I have made Earrings, Necklaces and Key Rings using Bottle Tops - ♥ em!
Did you see the Ghost? This is made using the Owl Builder Punch, but upside down and adding some googly eyes!
And the head of the Tombstone is made with the end of one of the Labels Collection Framelits - so cute, and this technique can also be used for making a Tag too. 


The Bat is made by using the "Elegant Butterfly" Punch {picture 1) and then re-punching to clip the lower wings off!
You can make a smaller Bat by using the "Bitty Butterfly" Punch {picture 2}.
I found this xtra cute idea on Pinterest and I have case'd this idea and Tutorial from Kimberly Morris, image source and Blog details can be found here


Stamp Sets: “Paisley Prints” (R) and “Got Treats” (R)
Punches: Decorative Label, Elegant Butterfly, Owl Builder
Framelits: Labels Collection Framelits
Embossing Powder: Black

Special Tools: Beer Bottle Caps/Soda Pop Tops, Big Shot, Crop-A-Dile, Designer Series Paper “Frightful Sight” (R), Dimensionals, Heat Tool, Googly Eyes, Organdy Ribbon – Calypso Coral. 

Saturday, 7 September 2013

Hello Sweet Friend

“Hello Sweet Friend”

We all have that one friend, you know the one, well this card is dedicated to Jen …
This idea is case’d from a recent blog/video post by France Martin aka Frenchie entitled “Lattice Die inside the Framelits Window”.

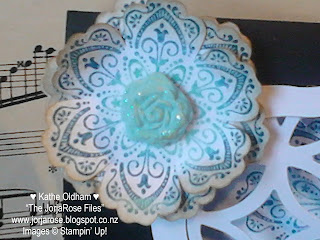
I used the ‘Rock “n” Roll” technique to create the peacock like colour on the flowers.
First, stamp the flower onto the “Coastal Cabana” ink pad, then with the darker colour, this time I used “Not Quite Navy”, roll the edge of the stamp around the ink pad, thus the “Rock ‘n’ Roll” technique is created!
I always use a lighter colour, then the darker colour, as I do not want to transfer ink from a darker pad to a lighter pad.
I have stamped and punched 3 flowers, then sponged with Crumb Cake, layered, and Braded.   The Brad is hidden under the handmade flower.
To make the flower, knead 2 drops of “Coastal Cabana” ink into a pinch of “Simply Pressed Clay”.  Sprinkle some Dazzling Diamonds in, then press into the “Buttons and Blossoms Simply Pressed Clay Molds”.  I always make in advance, as the Buttons and Blossoms need a couple of hours to air dry, or 10 minutes in the freezer.
Use the “Labels Collection” Framelits to create the window in the Basic Black cardstock, and then layer 2 of the Framelits to create the border around the outside of the window, cut from Whisper White, use a Stick On Note to keep in place.
Cut the “Lattice” in Whisper White and adhere behind the window, and then adhere the border on top of the window.
The words are stamped in “Not Quite Navy” then punched using the side of the “Decorative Label” punch, and then punched again using the opposite side. This is a quick and non-expensive way of making a smaller shape. The words and are then sponged with “Crumb Cake” and lifted by using Dimensionals.
I have “anchored” the card by using a Candy Dot on the bottom right of the card.


Stamp Sets: “Mixed Bunch”, “Petite Pairs” and “Six-Sided Sampler”
Punches: “Blossom” and “Decorative Label”
Framelits/Dies: “Lattice”, “Labels Collection”
Ink Pads/Inks: “Coastal Cabana”, “Not Quite Navy”, “Crumb Cake”


Special Tools: Big Shot, Buttons and Blossoms Simply Pressed Clay Molds and Simply Pressed Clay, Candy Dots, Dazzling Diamonds, Dimensionals, Stick On Notes, Sponges (for sponging!)
Related Posts Plugin for WordPress, Blogger...
Pin It
Blogger Wordpress Gadgets