Cotton Butterfly

Free background from VintageMadeForYou

Monday 17 February 2014

“Card In A Box - Flowers”


After seeing numerous versions of the gorgeous “Card In A Box” card, I had to give it a go!
I found a really informative tutorial by Tina Weller aka "The Serene Stamper" on Pinterest. 
Tutorial by Tina Weller aka "The Serene Stamper"

Once assembled, the box is then designed to lay flat to allow for posting.

For the colour theme, I decided on two gorgeous colours Melon Mambo and Calypso Coral, with hints of buttery Daffodil Delight.


On Tina’s Tutorial, she used 2 strips across the middle of the box to adhere the flowers to, but I used 3 strips {or beams}.


Not to confuse you further … instead of using strips of cardstock to adhere the flowers to, I chose to use thick clear plastic, re-purposed from the packaging on ink cartridges.
As you can see from the undercarriage of the box, I adhered the plastic strips to the cardboard “beams”, once adhered; I then cut off the excess plastic.


The flowers are stamped from the “Flower Shop” stamp set, and layered between Dimensionals.
For the centre of the flowers, I stamped in Daffodil Delight a small stamp from the “Hello, Lovely” stamp set, onto Daffodil Delight cardstock, punched from the “Boho Blossom” Punch.

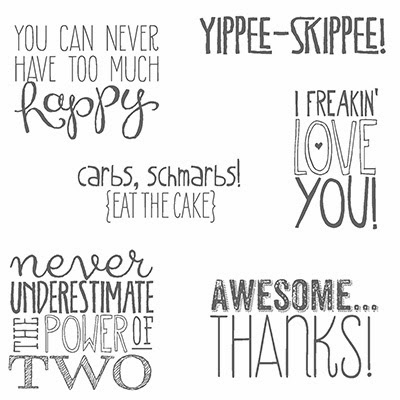
On the reverse side of the box, I stamped the words “You can never have too much happy” from the “Yippee-Skippee!” stamp set, with Melon Mambo and Calypso Coral Stampin’ Markers.
As the box can be folded flat, the back panel leaves room for a special message for the lucky recipient.


For the birds, I punched one complete bird from the “Bird Builder” punch, and then punched a second wing, that sat behind the bird, to make it look as though they were flying.


This card was a great way of using up scraps, as you can see from the list or papers I used!

I really enjoyed making my first “Card In A Box”, and am making another version tomorrow, so watch this space …

“Epic Day This and That” DSP
“Soho Subway” DSP
“Tea For Two” DSP, also available on My Digital Studio

“Flower Shop”

“Chalk Talk”
“Hello, Lovely”
Yippee-Skippee!”


 "Beautiful Wings" Embosslits

Recipe Ingredient List

Stamp Sets: “Chalk Talk”, “Flower Shop”, “Hello, Lovely”, “Yippee-Skippee!”
Ink:  Melon Mambo, Calypso Coral, and Daffodil Delight, with Melon Mambo and Calypso Coral Stampin’ Markers.
Cardstock: Naturals White, Old Olive, “Epic Day This and That” DSP, “Soho Subway” DSP, “Tea For Two” DSP, also available on My Digital Studio
Punches: Bird Builder, Boho Blossom, Corner, Pansy
Framelits/Dies: Beautiful Wings Embosslits, Chalk Talk Framelits,
Xtras: Black Rhinestones for the bird eyes, recycled plastic packaging, Stampin’ Dimensionals

Special Tools: Big Shot, Stampin’ Scrub and Stampin’ Cleaner, Stampin’ Trimmer

Sunday 16 February 2014

“See Ya Later ... Alligator”


Reilly had a birthday party to go today, and being 12 {well he’s actually 12 going on 14 on Tuesday!!!}, the card needed to be “cool”, hence the Alligator from the Sale-A-Bration stamp set “See Ya Later” and the croc from the “Zoo Babies” stamp set seemed perfect.

My new stamp “Hardwood” has just arrived and I have used it in two projects today, I think it has now become my favourite!
Stamped in “Crumb Cake” on the front of the card, it gave a neat background to the snappy alligator!

I have seen many crafters replicate the alligator using the Petite Pennants Builder punch, so I can not give credit back to the original artist – sorry.
Punched in my favourite colour Old Olive, I also used the Old Olive to stamp the croc from the “Zoo Babies” stamp set, and the words “Yippee-Skippee” from you guessed it … the “Yippee-Skippee!” stamp set!
Now back to the croc, I gave it some googly eyes and gnashing teeth (in Whisper White) to make it seem more scary!

The birthday wishes are also from the Sale-A-Bration stamp set “See Ya Later”, and the Stampin’ Makers used are Old Olive, Tangerine Tango and Real Red.
Stamped on to Naturals White, and cut using the Chalk Talk Framelits, layered and adhered to Old Olive cardstock, and then dimensional’d.

A Candy Dot in Old Olive completes the card and anchors the corner.


On the inside of the card, and cut from Old Olive, I have used my favourite “Top Note” Bigz Die to make a pocket for the gift voucher, and added a Pin Wheel for added fun!


Also on the inside of the card and stamped in Crumb Cake is the “Gorgeous Grunge” stamp set.


So {hopefully} this card is totally grunge and way cool dude!!!


Polka Dot Parade Designer Series Paper $22.95


"See Ya Later" {SAB}
Choose a Sale-A-Bration reward for FREE with a $110+ order


":Zoo Babies"


"Hardwood"


"Gorgeous Grunge"


"Yippee-Skippee!"


"Petite Pennants Builder" Punch


"Owl Builder" Punch


"Top Note" Bigz Die


"Beautiful Wings" Embosslits


Recipe Ingredient List
Stamp Sets: Gorgeous Grunge, Hardwood, See Ya Later {SAB}, Yippee-Skippee! and Zoo Babies
Ink:  Crumb Cake and Old Olive, with Stampin’ Makers Old Olive, Tangerine Tango and Real Red
Cardstock: Naturals White, Old Olive, Polka Dot Parade DSP, Whisper White
Punches: Owl Builder, Petite Pennants Builder
Framelits/Dies: Beautiful Wings Embosslits, Chalk Talk Framelits, Top Note Bigz Die
Xtras: Brad, Candy Dot, Googly Eyes, Stampin’ Dimensionals


Special Tools: Big Shot, Stampin’ Scrub and Stampin’ Cleaner, Stampin’ Trimmer

”Watercolour Wonder” Gift Voucher and Matching Card …

My Digital Studio Gift Voucher and Matching Card …


Soooo exciting … got my first lead through the Stampin’ Up! “DBWS” Demonstrator Business Web Services …
A lovely lady called and requested a gift voucher for her Mom’s birthday, so I attempted to create a {not to shabby I might add!!!} gift voucher using the My Digital Studio software.


I downloaded the DSP (Designer Series Paper)”Watercolour Wonder”, and used this as a base for the gift voucher, and also printed a sheet onto Naturals White to use in the matching card.


I used the Circle Card Framelits, and cut the cardstock flowers side down, I added an xtra length to the cardstock to create the flap in front.


My new stamp “Hardwood” has just arrived and I have used it in two projects today, I think it has now become my favourite!
Stamped in “Basic Gray” on the inside of the card, and when the Vellum was layered over top, it created a lovely muted tone.


I purchased Soda Pop Tops {or recycle beer bottle tops} from my local supermarket, you can get around 100 for NZ$5.
Flatten in the Big Shot, and remove seal.
Punch a 1" 2.5cm circle from the printed ”Watercolour Wonder” on Naturals White cardstock.
Use the “Crystal Effects” to adhere to the Soda Pop Top, and then fill in the Soda Pop Top with more Crystal Effects and leave to dry for 12 hours.
You will be left with a really glossy effect, and this technique would be perfect for making a Sun.


I ♥ the “Rock and Roll” technique, and used it on the flowers, with my “Mixed Bunch” stamp set …
1) Ink stamp on light-coloured ink pad {I used Daffodil Delight}.
2) Press edges of stamp in rolling motion on darker ink pad {Tangerine Tango}, being careful not to ink the centre of stamp.
Tip:
Always use the lightest coloured ink first to avoid getting dark ink on your light ink pad.


To make the Vellum really pop, whilst ink is still wet (I used my “Daffodil Delight” Stampin’ Pad}, sprinkle with embossing powder {“Iridescent Ice”}, and heat set with Heat Tool.  
Wah-lah, you can now make any coloured embossing powder!


I hope Laura and her Mom are really pleased with the gift voucher and matching card!

”Watercolour Wonder” {My Digital Studio download} $6.95
”Watercolour Wonder” Designer Series Paper $22.95
“Epic Day This and That” Designer Series Paper $22.95
Circle Card Framelits
"Hardwood"
"Flower Shop"
"Mixed Bunch"


"Banner Blast" {SAB}
Choose a Sale-A-Bration reward for FREE with a $110+ order


"See Ya Later" {SAB}
Choose a Sale-A-Bration reward for FREE with a $110+ order


"You’re Lovely" {SAB}
Choose a Sale-A-Bration reward for FREE with a $110+ order

Recipe Ingredient List
Stamp Sets: Banner Blast {SAB}, Flower Shop, Hardwood, Mixed Bunch, See Ya Later {SAB}, and You’re Lovely {SAB}
Ink:  Basic Gray, Daffodil Delight, Tangerine Tango + Daffodil Delight, Tangerine Tango Stampin’ Markers
Cardstock: “Epic Day This and That” DSP {leaves}, Naturals White,”Watercolour Wonder” {My Digital Studio download}, Vellum
Punches: 1" 2.5cm Circle, Banner {SAB}, Bird Builder, Blossom, Pansy, 
Embossing Powder: Iridescent Ice
Framelits: Circle Card Framelits
Xtras: Bakers Twine, Candy Dot Brad Bases, Crystal Effects, Rhinestone Basic Jewels, Soda Pop Top, Stampin’ Dimensionals


Special Tools: Big Shot, Heat Tool, Stampin’ Scrub and Stampin’ Cleaner, Stampin’ Trimmer

Friday 14 February 2014

“Valentine’s Day Cup-Cakes”


Today is Valentine’s Day, and JorjaRose had a “shared lunch” at school today.  
Sooooo we decided on a Valentine’s Day theme for her “plate”

Each child is asked to bring a plate of finger-food to share, what with 600+ kids at school, and 200+ in her Syndicate, there was quite an array of goodies to eat!

Last night, JorjaRose made these cup-cakes by herself with supervision from moi.

We used a packet of “Edmonds Angelic Vanilla Cake”, and only had to add an egg and some water to the mixture {as per the directions}.


Instead of baking a Cake, we decided to make Cup-Cakes, and there was enough batter to make 18 Cup-Cakes!


AND this morning she was up at 7am ready to ice the Cup-Cakes!!!

When we went to make the icing, we discovered we had no food colouring, so added Jelly Crystals in the icing, which gave it the pink colour.

We made these cute little Toppers by re-purposing paint strip samples, and punched out a zillion hearts in different colours of pinks, and then we used double-sided tape to adhere to the long toothpick skewers.

 
At the shared lunch, JorjaRose’s Valentine’s Day Cup-Cakes were the first to go; secretly I think the little girls just wanted the heart Toppers!!!


Related Posts Plugin for WordPress, Blogger...
Pin It
Blogger Wordpress Gadgets