Cotton Butterfly

Free background from VintageMadeForYou

Friday, 29 August 2014

“Create With Kathe” For Thursday 21st August 2014


This past week was all about the gorgeous and versatile “Kinda Eclectic” stamp set, and the Scallop Tag Topper Punch.
We made two projects, the first a Gift Holder, which contains a small greeting card and cellophaned Lip Balm, the second project is a Greeting Card with a fancy closing {made wit the Scallop Tag Topper Punch}, and has many details ...
The ladies got to choose between two of the new “In Colours”, Blackberry Bliss or Lost Lagoon …


Project 1 Gift Holder + Git Card + Lip Balm
This is a case via my good friend Ruth, however I altered the measurements and added the Scallop Tag Topper closing + Lip Balm Holder, and card.
Naturals White cardstock forms the base of the Gift Holder.
Please see diagram …


Cut cardstock 7” x 11 1/2”
Along the 7” length, score at 2 ½” in on both sides, which leaves a 2” panel in the middle.
Along the 11 ½” length, score at 4 ¾” and 6 ¾”
At the 4 ¾” and 6 ¾” score marks, measure 2 ½ “ along the crease line, draw a diagonal line to the fold, cut of all shaded areas.
Once the shaded areas are cut away, measure ½” along the 11 ½ “ length and cut the sides off.
You will be left with a long slim piece of cardstock with what looks like wings on either side.
Crease along the scored lines.
Stamp on one side, at both ends, where the Scallop Tag Topper will be punched.


Flip the cardstock over and stamp the Wings.


First stamp the leaves with the “Kinda Eclectic” stamp set in Crumb Cake, once dry, stamp over and just to the side {to give a shadow effect} with either Blackberry Bliss or Lost Lagoon.
Fold the Wings inwards, and turn the cardstock inside out, the “Wings” then become the pockets, in which the gift card is placed.


A cute little card slips into the pocket, with some butterflies added for special effect.
Hanging in the middle of the Tag Tops is a cellophane bag which contains a Lip Balm.


Ribbon is threaded through the Tag Tops and tied.
Wah-lah … Gift Holder + Git Card + Lip Balm done!

Project 2 Scallop Tag Topper Greeting Card


The cardbase is Naturals White, and has accents of Blackberry Bliss or Lost Lagoon. Designer Series Paper Stack in the corresponding colour is also used.
Stamp sets featured are “Bloom with Hope”, “Four Feathers”, “Hardwood”, and “Six-Sided Sampler”.

This card features many xtra details like the two toned feather, white embossed feathers, negative detail via the Hearts Border Punch, Vintage Faceted Designer Buttons that have been coloured with the Blendabilities, Crystals Effects Dots that have been coloured with the Blendabilities, and Aqua Painted flowers.
Wah-lah … Scallop Tag Topper Greeting Card done!


Phew!!! 
This Class should have been 2 hours, but it actually took 3 hours, but all the effort was worth it!


Recipe Ingredient List
Stamp Sets: “Bloom with Hope”, “For All Things”, “Four Feathers”, “Hardwood”, “Kinda Eclectic”, and “Six-Sided Sampler”.
Ink:  Blackberry Bliss, Crumb Cake, Lost Lagoon, Sahara Sand, Black StazOn
Blendabilities: Coastal Cabana, Rich Razzleberry
Cardstock:  Blackberry Bliss, Lost Lagoon, Naturals White, Whisper White, Designers Series Paper Stack in Blackberry Bliss and Lost Lagoon + Vellum
Punches: Bitty Butterfly, Corner, Elegant Butterfly, Hearts Border, Hexagon, Scallop Tag Topper,
Framelits/Dies: Four Feathers, Hexagon Hive
Xtras: Cellophane Bags, Crystal Effects, Dimensionals, Embossing Powder in White, Linen Thread, Rhinestone Basic Jewels, Stitched Satin Ribbon, Tombow Multipurpose Glue, Venetian Crochet Trim,  Vintage Faceted Designer Buttons, oh and a Lip Balm!

Special Tools: Big Shot, Heat Tool, Magnetic Platform, Stampin’ Scrub and Stampin’ Cleaner, Stampin’ Trimmer, StazOn Cleaner


Thursday, 28 August 2014

Spinning Card: Festive Flurry

Festive Flurry Spinning Card


Saying goodbye to the “Festive Flurry” stamp set, at today’s “Create With Kathe” class we made this xtra cute Spinning Snowflake card, featuring Stampin' Up! "Festive Flurry" stamp set + matching Framelits + "Mixed Bunch" and "White Christmas" stamp sets ...


This card also features the “Emboss Resist” Technique, and is sponged in Soft Sky and Crumb Cake.
The Card base is Pool Party, and the Snowflake is heat embossed in Silver, on Whisper White cardstock.
One of the cute and new “All Is Calm Snowflake Embellishments” are added to the centre to the dimensionaled Snowflake and a Candy Dot Brad Base is used to secure along with a Rhinestone Basic Jewel.


The inside of the card has a cute Christmas scene from the "White Christmas” stamp set and is stamped on Whisper White cardstock in Early Espresso and Aqua Painter are used in Pool Party {for the car} Soft Suede {for the trees}, and Pear Pizzazz {for the Christmas Tree} … way to cute!

#Stampin'Up! #CreateWithKathe #JorjaRoseFiles

Recipe Ingredient List
Stamp Sets: “Festive Flurry”, "Mixed Bunch" and "White Christmas"
Ink:  Crumb Cake, Early Espresso, Old Olive, Pear Pizzazz , Pool Party, Soft Sky, Soft Suede
Cardstock: Pool Party, Whisper White, Vellum
Framelits: Circles Collection, Festive Flurry
Xtras: “All Is Calm Snowflake Embellishments”, Candy Dot Brad Base, Dimensionals, Embossing Powder in White and Silver, Rhinestone Basic Jewel, Tombow Multipurpose Glue and 2x 10c pieces of real money!!!


Special Tools: Big Shot, Glue Gun, Heat Tool, Magnetic Platform, Stampin’ Scrub and Stampin’ Cleaner, Stampin’ Trimmer,

Wednesday, 27 August 2014

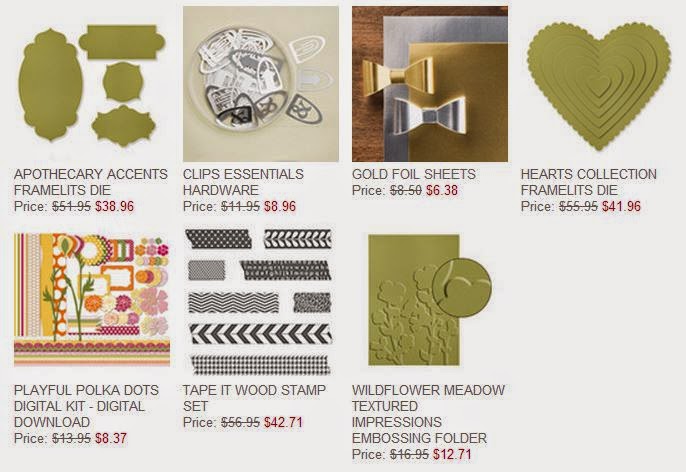
Stampin' Up! Weekly Deals > 27.08.2014

Woop woop ... the Weekly Deals are up ...
{Jen} please email me with your order{s} of the "Apothecary Accents" Framelits - I know this was on your Wish-List!

#JorjaRoseFiles #CreateWithKathe "The JorjaRose Files"


Tuesday, 19 August 2014

“Create With Kathe” For Thursday 14th August 2014


Crickey where has the month gone?!!!
As my Christmas Pre-Order has arrived, I thought we could make a start on Christmas Cards … shock horror!
This week, as the Weekly Deals also had the ever cute “Petite Purse” Die, at a reduced price, we also made a cute little handbag.

So Thursday we made 3 projects, a Christmas, Card, a Reflection Card and a Petite Purse.


Thursday we had a house full of lovely ladies, and one of my crafty ladies said “You know we are all Blonde of a hue”!!!
It took a moment before we all comprehended, and we had such a laugh.
Yes, we are all Blonde {some bottle like moi!}, continuing through the Blonde colour wheel to land on Silver!
I do so love the companionship of my weekly crafty ladies.

Project 1” Snowflake Christmas Card


This card features the “Snowflake Card Thinlits Dies” and the “Holiday Home” stamp set and matching “Homemade Holiday” framelits.
The card base is Pool Party, which has been embossed with the Decorative Dots Embossing Folder.
A lining of Pool Party Designer Series Paper Stack is adhered to the inside, with Vellum over-layed to give a softened effect.
Whisper White cardstock is cut with Paper Smooches Dies to create the two snowbanks.
From the stamp set “Holiday Home”, a little house is stamped onto Whisper White cardstock, and decorated, and then cut using the “Homemade Holiday” framelits.
Trees, a lampshade and a snowman are stamped, and the new “Frosted Sequins” and Crystal Effect Dots coloured with the Coastal Cabana Blendabilities Pens are scattered around the card.
The words “From our home to yours at Christmastime” are stamped in Black StazOn onto the Vellum.


The snowflakes on the flip are layered in Whisper White, and a Crystal Effect Dot is placed in the centre of each of the snowflakes.
The Belly Band finishes the card off, and is made using the {Vintage} Lace Ribbon Border Punch and the word “Merry” is from the Vintage “Expressions”Thinlits Dies {and available on the Clearance Rack for $31.19}, and is cut from the gorgeous Champagne Glimmer Paper. 


Wah-lah Snowflake Christmas Card done!

Project 2” Reflection Card


This card is a Tutorial and case by France Martin, and features the Reflections technique, which is created by using Clear Packaging Tape, I purchased 36mm, but in hindsight, should have purchased 48mm!
Please click here to watch Frenchie's Video Tutorial.
When we first started this project the ladies thought I was joking about putting the Packaging Tape on our arms {this reduces the stickiness!}. It is important also use your Dust Buddy too!

The card base is Crumb Cake, with a layer of Pool Party {which is adhered with tape or glue}, and the sponging and reflections is all created on the Whisper White Cardstock, which is adhered with Dimensionals.
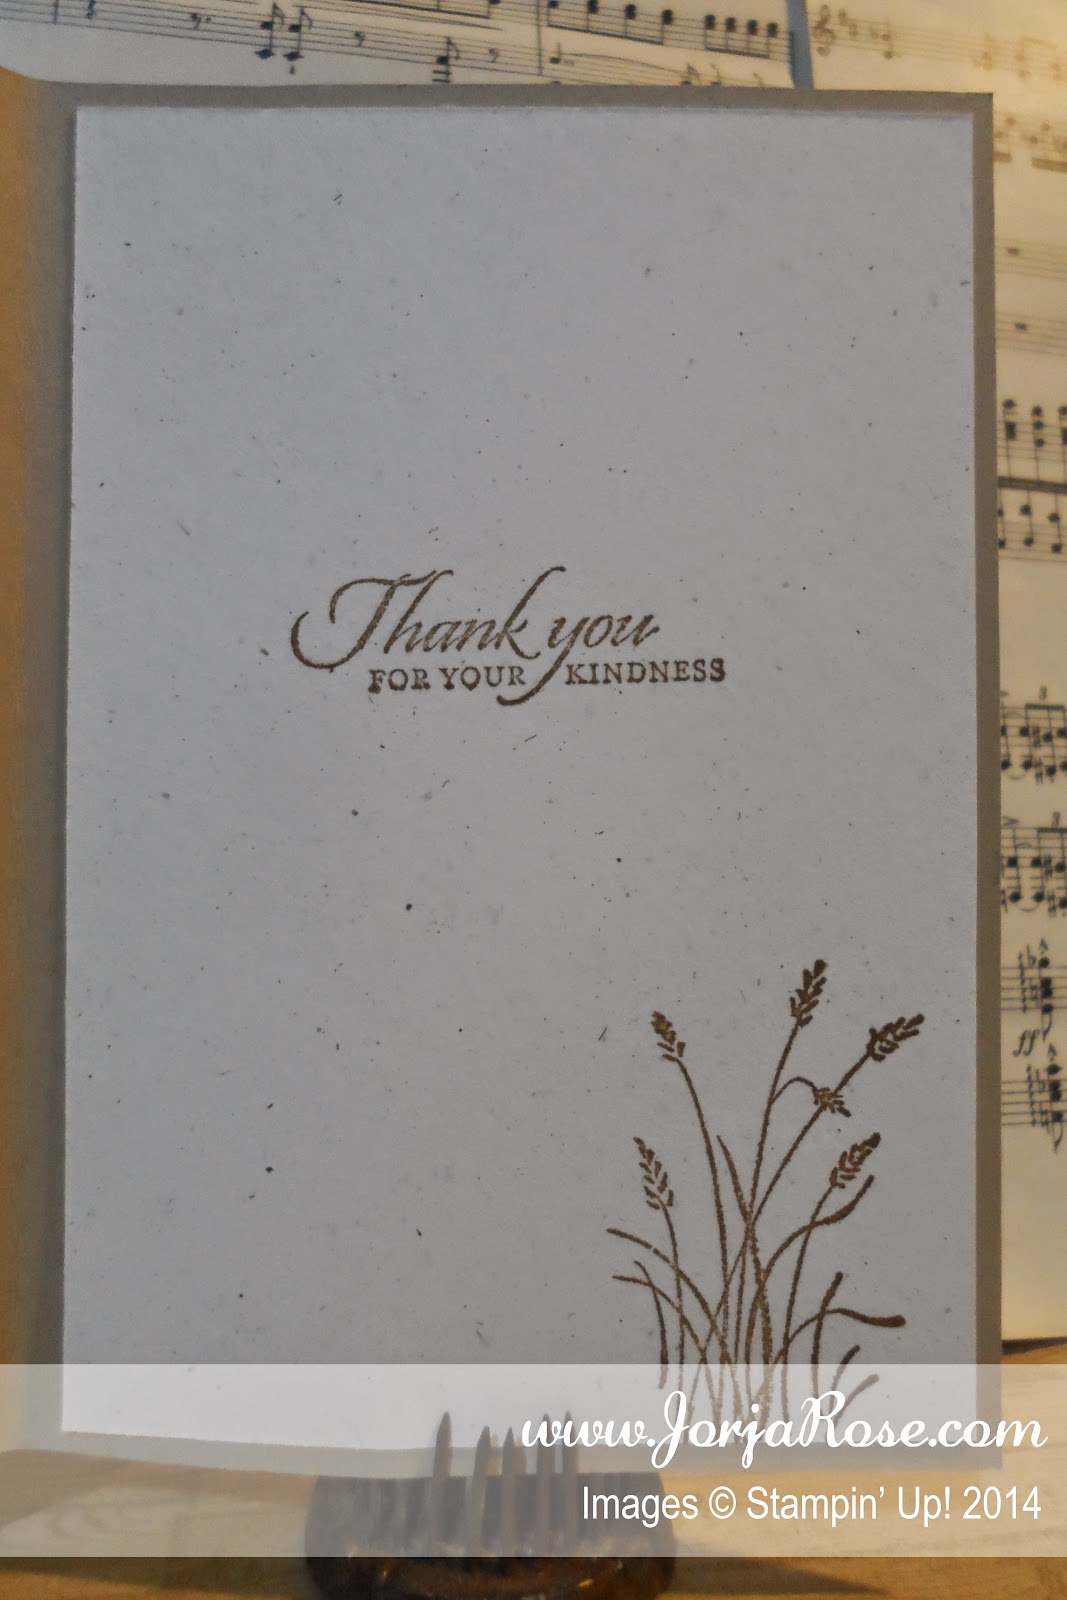
This card featured the stamp set “Wetlands”, and I love this stamp set, as it is so universal, along with the Canadian Goose, Pipers and Reeds, it also has the gorgeous and ever appropriate wording “ Thank You For Your Kindness”, “Birthday Greetings” and “Thinking of You”, which his perfect for bereavement or thinking of you cards.


"Wetlands" Stamp Set

The sponging is done in this order Soft Sky, Sahara Sand, Pear Pizzazz, Sahara Sand and finally Marina Mist for the water.
The Canadian Goose and Reeds are stamped in Early Espresso.
Once all sponged ink is dry, use the Dust Buddy to remove all dust, fingerprints etc and to stop the Packaging Tape from sticking.
The reflections are stamped in Soft Suede, I chose this colour after experimenting with the colours Frenchie suggested, and felt this hue gave the best effect for my card.
On the sticky side of the tape, stamp {separately on two strips of tape} the Canadian Goose and Reeds in Soft Suede, and turn the tape around, so it matches the original stamp {but a mirror image} and press down onto the cardstock, the inked colour will come off of the tape and on to the Whisper White cardstock.
Carefully peel the tape back and remove it.
A second Canadian Gooses is stamped on Water Colour Paper in Black StazOn, and coloured using the Aqua Painters, and for the beak “So Saffron”, then fussy cut and adhered with Dimensionals.
The inside of the card is Naturals White, and has been stamped with Soft Suede.
I let the ladies choose which sentiment they wished to use from the Wetlands stamp set of: “Thank You For Your Kindness”, “Birthday Greetings” or “Thinking of You”.


And “Wah-lah” as Frenchie would say … Reflections Card done!

I really enjoyed sharing this technique, and I will be back to the hardware shop {again} this week to get a wider Clear Packaging Tape, as my new stamp set “Lovely As A Tree” has beautiful tress that are allot wider.
I have some really cute ideas running through my mind at the mo, and want to really show the “Reflections” technique off!
Thanks Frenchie!

Project 3 ”Petite Purse


To match back with our other projects this week, we used Pool Party Designer Series Paper to cut the Petite Purse.
The Petite Petals Punch is used to punch some little flowers, and I reversed the cardstock, as it is double sided, and I also added a Vellum Petite Petal..
The flowers are then layered, and a Mini Brad added, for the sides and front of the cute little purse.
Wah-lah “Petite Purse” done!

After making soooo many of these over the past couple of years, I can just about make these in my sleep.
When I first saw this Die come on the market in the US, I just had to have it!
I contacted several Stampin’ Up! Demonstrators, but they were unable to ship to New Zealand.
Thinking outside of the box, I went to ebay, where I was able to purchase it, and I had it for about 6 months before it was released here in New Zealand!
Gotta love ebay!!!

Oh and by the way …
My son just gave me a ”Mood Scanner” Ap/test on his cellphone and my result …
“Fractured  - No longer functional, broken or crushed”!
Soooo accurate!!!

Recipe Ingredient List
Stamp Sets: “Holiday Home”, “Wetlands”
Ink: Crumb Cake, Early Espresso, Marina Mist, Pear Pizzazz, Sahara Sand, Soft Suede, Soft Sky, Black StazOn
Blendabilities: Coastal Cabana
Stampin’ Write Markers: Chocolate Chip, Real Red, So Saffron
Cardstock: Champagne Glimmer Paper, Crumb Cake, Naturals White, Pool Party Whisper White, Vellum, and Designers Series Paper Stack in Pool Party + Water Colour Paper
Punches: {Vintage} Lace Ribbon Border Punch, Petite Petals
Framelits/Dies: “Homemade Holiday”, “Petite Purse”, Snowflake Card Thinlits Dies”, {Vintage} “Expressions Thinlits”
Embossing Folders: “Decorative Dots”
Xtras: Aqua Painters, Blender Pens, Clear Packaging Tape, Crystal Effects, Dimensionals, Dust Buddy, "Frosted Sequins”, Glue Dots, Paper Smooches Dies, Sponges, Tombow Multipurpose Glue

Special Tools: Big Shot, Heat Tool, Magnetic Platform, Stampin’ Scrub and Stampin’ Cleaner, Stampin’ Trimmer, StazOn Cleaner


Sunday, 17 August 2014

Big Shot & Bundles ... More Info ...


Big News ... Big Shot & Bundles ...


If you're anything like me, you absolutely love when BIG opportunities come your way. And because we all know the Big Shot is a big deal, Stampin' Up! thought they'd offer you something you couldn't miss; an exclusive Big Shot opportunity that lasts for the entire month of August!
Stampin' Up! want to put a Big Shot into the hands of every customer before the holiday catalogue — full of sweet Big Shot accessories.
That's why with every purchase of a Big Shot in August, YOU, the customer will receive one of five free stamp set/Framelits bundles below, of your choice! That's up to a $130 NZD value!!
Not only that, but if you already own a Big Shot {or Cuttlebug} , you can still purchase these designated bundles at an amazing 15% off! 
This is one deal you won't want to miss—only available from 1-31 August—as these bundles are one-time only exclusives.

Two Choices:
1) Buy a Big Shot {$179.95 + 5% postage} and get one free bundle below.
  and/or
2) Buy a discounted bundle below at a 15% discount

"Bright and Beautiful Stars Bundle:
Clear Mount $91.50, Wood Mount $105.95

Celebrating Chalk Talk Bundle
Clear Mount $77.95, Wood Mount $90.75

"Decorative Goodies Bundle"
Clear Mount $76.25, Wood Mount $88.25

"Flowery Daydream Bundle"
Clear Mount $99.95, Wood Mount $113.75

"Sumthin' With Word Bubbles Bundle"
Clear Mount $65.25, Wood Mount $70.25

So if you already own a Big Shot or CuttleBug, you can still purchase the above Bundles at the incredible prices listed.
I am seriously considering buying a second Big Shot, just for the FREE Bundle!!!
Any ?'s please ask .


Wednesday, 13 August 2014

“Create With Kathe” For Thursday 7th August 2014


This week was all about the gorgeous stamp set “Kinda Eclectic”, this is my favourite stamp set from the new Catty!
I like to show the ladies how they can utilise one Stampin’ Up! product, and use it many different ways.
This week we made two greeting cards, which look completely different from each other.

The first card is a Shaker Window Card, and is case of a lovely layout by France Martin, however I changed many of the details, but kept the window {different shape though}, shaker and stamp set the same.
The second card made is all about the “inchies” and layering, and was my first time using Naturals Cream cardstock {I usually use Naturals white as my card-bases}.

As we had a couple of my favourite ladies absent this week, I made their cards up for them.
When I went to start the remake, I discovered that quite by accident my sample card had gone home with one of the other ladies, so ended up making another 3 Shaker Window Cards – phew!

Project 1 ”Shaker Window Card
 
 
5 ¾“ x 8 ¼”               Bermuda Bay {Card-Base}, A5
5 5/8” x 3 ¾”            Naturals White x2
5 5/8” x 3 ¾”            Pool Party
5 5/8” x 3 ¾”            Acetate
3 ½” x 4 ½”               Coastal Cabana {Window Border}
3 ½“ x 3 ½“               Pool Party {Insert Heart}
Xtra                            Naturals White for the Butterflies

This card is all about tone-on-tone, and features 3 colours that work so well together, Pool Party, Coastal Cabana and Bermuda Bay.
The card-base is Bermuda Bay, with the lining/insert in Naturals White.
On a piece of Naturals White, and using Versamark and Gold Embossing Powder, stamp and heat emboss the Sun from the “Kinda Eclectic” stamp set. Add a small circle {3/4”} of “Champagne Glimmer” cardstock for the centre of the Sun. Then Stamp the leafs in Bermuda Bay ink.
Make a packet for the Shaker using a Cellophane Bag and add “In Color Sequins Assortment” to the packet. Seal and place on top of the Naturals White Cardstock.
Using the Costal Cabana cardstock {3 ½” x 4 ½”}, and using the Labels Collection Framelits, cut a “Label”, then using the next size down, cut another label inside for the first, to leave a border. Discard the Label and keep the border.
Using the same smaller Framelit {as used above}, cut a hole in the Pool Party Cardstock {5 5/8” x 3 ¾”}.
Stamp the leaves in Coastal Cabana around the cardstock.
Through practise {and trial and error!} I discovered it is better to cut the hole {Label} first, and leave a clean “Label” to be used in another project, rather than stamp the cardstock first, and then cut the Label, as this left leaves all over my spare Label!
On the Acetate, first use the Emboss Buddy to get rid of fingerprints etc, then stamp with White StazOn the words “A little kindness goes a long way” from the “Kinda Eclectic” Stamp set.
On the xtra Naturals White cardstock, stamp 4 large butterflies in Bermuda Bay, and 4 small butterflies in Costal Cabana. Then use the Elegant Butterfly and Bitty Butterfly Punches to punch out the butterflies.
Layer the butterflies, and add 3 small Pearls to the middle of each butterfly.
Now it’s all about the assembly for the front of the card.
You may have to trim the underlying layers to fit.
Adhere as follows, Bermuda Bay {card-base}, Naturals White, Cellophane Packet, Acetate, Pool Party, Coastal Cabana window frame.
All of the layers are adhered by tape {or glue if you’re a glue crafter!}, except for the layer of Pool Party, which adhered with Dimensionals.
Add 3 butterflies to the side of the card at varying angles.


For the card insert, take the Naturals White cardstock and using the “Hearts Border” Punch, punch the top, this leaves negative detail, which when placed over the Bermuda Bay cardstock, you can see the colour popping through the hearts. Also corner the Naturals White insert with the “Corner Rounder” Punch
Stamp the words “Thank you from the bottom of my heart” from the “From My Heart” stamp set, in Bermuda Bay on to Pool Party.
Use the “Hearts Collection” Framelits to cut a heart, and add a Pearl to the little swirls at the top and bottom of the heart.
Adhere heart to the Naturals White insert, and add the 4th butterfly to the bottom corner.
And finally, adhere the Naturals White insert to the Bermuda Bay card-base.
And as Frenchie would  say … “Wah-lah” Shaker Window card done!

Project 1 ”Inchies Card
 
 
5 ¾“ x 8 ¼”               Soft Suede {Card-Base}, A5
5 5/8” x 3 ¾”            Naturals Cream x2
Xtra                            Soft Suede for the Postage Stamps
Xtra                            Naturals Cream for the Butterflies and 1” Square s
1” x 1”                        Champaign Glimmer Paper

Compared with the above card, this was my quick and easy project.
On Naturals Cream cardstock {5 5/8” x 3 ¾”} offset the corners, by punching the opposite corners with the Corner Rounder Punch.
Add a Candy Dot Brad Base and Pearl to the bottom right corner.
Stamp the words “A little kindness goes a long way” from the “Kinda Eclectic” Stamp set, in Soft Suede, and adhere to the card-base with tape {or glue}.
Punch 4 postage stamps from the Soft Suede cardstock, using the “Postage Stamp” Punch.
On Naturals Cream cardstock, stamp the leafs in Soft Suede, 2 large butterflies in Soft Suede and 2 small butterflies in Crumb Cake {all from the “Kinda Eclectic” Stamp set}.
Using the “1” Square”, the “Elegant Butterfly” and “Bitty Butterfly” Punches, punch 2 x leafs, the butterflies, and well as the “Champagne Glimmer” Paper.
Prepare the “inchies” by layering the 1” squares with Dimensionals on to the Postage Stamps.
With the butterfly, layer together, and then add a strand of Linen Thread for the antennae. Add a Dimensional and layer on to the final Postage Stamp.
Place the Postage Stamps on to the Naturals Cream cardstock, and then tape {or glue} down, ensuring that they are all evenly spaced, and straight!


For the card insert, as above, take the Naturals Cream cardstock and using the “Hearts Border” Punch, punch the top, this leaves negative detail, which when placed over the Soft Suede cardstock; you can see the colour popping through the hearts. Also off-set the corners the Naturals Cream insert with the “Corner Rounder” Punch to match the front of the card.
Stamp the banner dots in Crumb Cake along the bottom of the cardstock.
Add the second butterfly {antennae include!} to the bottom right corner.
Adhere the Naturals Cream insert to the card-base using tape {or glue}.
Wah-lah Inchies Card done!

AND today I unpacked my Christmas pre-order …


Can’t wait to try out these goodies …
Stamp sets: "Festival Of Trees", "For All Things", "Four Feathers", “Holiday Home”
Framelits: “Feathers”, “Homemade Holiday”, Card Thinlits Dies "Snowflake"
Punch: “Tree”
AND my freebie Hostess stamp set "Good Greetings".
Ahhhh … I’m in heaven!

Recipe Ingredient List
Stamp Sets: “From My Heart”, “Kinda Eclectic”
Ink:  Bermuda Bay, Coastal Cabana, Crumb Cake, Soft Suede, Versamark, White StazOn
Cardstock: Bermuda Bay, Champagne Glimmer Paper, Coastal Cabana, Naturals Cream, Naturals White, Pool Party, Soft Suede
Punches: ¾” Circle, 1” Square, Bitty Butterfly, Corner, Elegant Butterfly, Hearts Border, Postage Stamp
Framelits/Dies: “Hearts Collection”, “Labels Collection”
Xtras: Acetate, Basic Pearl Jewels, Candy Dot Brad Bases, Cellophane Bags, Dimensionals, Gold Embossing Powder, In Color Sequins Assortment, Linen Thread

Special Tools: Big Shot, Heat Tool, Magnetic Platform, Stampin’ Scrub and Stampin’ Cleaner, Stampin’ Trimmer, StazOn Cleaner


Related Posts Plugin for WordPress, Blogger...
Pin It
Blogger Wordpress Gadgets