Cotton Butterfly

Free background from VintageMadeForYou
Showing posts with label Four Feathers. Show all posts

Tuesday 28 October 2014

“Create With Kathe” For Thursday 23rd October 2014


Wellll … actually that should be {not well and …} “Create With Kathe” for Tuesday AND Thursday, as I had 3 Classes last week!
I was so thankful for the Tuesday Class, as it meant I had designed and made up Kits ready for Tuesday AND Thursday, as my son broke his arm on the Wednesday, on the way to school, which meant I spent the whole day at the Hospital with him, getting his arm manipulated and realigned, before being put in plaster past his elbow – poor kid!

We made two projects last week, the first a textured card in tones of Soft Suede, Crumb Cake and Naturals White, with the cute message “A Little Birdie Told Me” from the Hostess Stamp Set “Hello Love”.
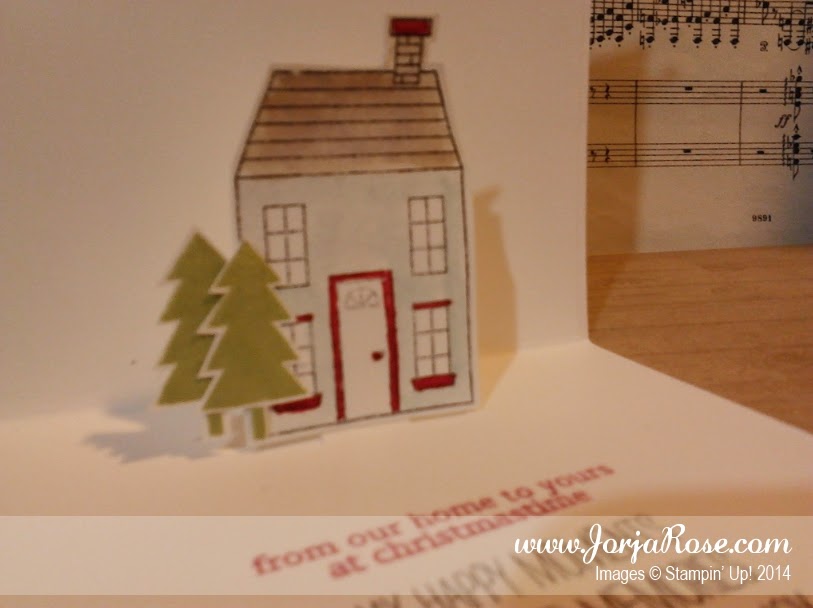
The second project was a pop-up Christmas card, featuring a Snow Glow and the stamp sets “Holiday Home”, “White Christmas” and “Wondrous Wreath”.   This card is a case of a sketch by Paula Dobson from her Facebook page "Stampinantics"…

Project 1 Textured Card W/ “Hello Love” Stamp Set


This card could be used a congratulations card for a new job, new house, new baby, new relationship etc, as the sentiment “A Little Birdie Told Me” can lead towards any occasion.
The cardbase for this card is Soft Suede {with the corners rounded with the Project Life Corner Punch}, with layers of Crumb Cake and Naturals White.
A mesh layer of construction tape is placed on the card horizontally, then the Crumb Cake layer which is cut using the “Top Note” die.
A second Top Note is cut in Naturals White and the stitched edge is trimmed, including the horizontal points, so that the Burlap and Naturals Chevon Ribbon will lay flat.


Half a “Tea Lace Paper Doily” is adhered to the Naturals White Top Note, then the Burlap, which has been cut with the “Large Scallop” Die, then the Naturals Chevron Ribbon are adhered with orange Sticky Strip, which is xtra strong and perfect for adhering ribbon.
The Naturals White layer is then adhered with Dimensionals to the Crumb Cake layer.


The bird and sentient “A Little Birdie Told Me” are from the “Hello Love” Stamp Set and are stamped in Early Espresso on Naturals White, the outline for the sentiment is stamped in Soft Suede.
The bird and sentiment are then fussy cut, sponged with Crumb Cake and adhered with the Dimensionals.
The finishing touch is a Candy Dot “anchor” made form Dazzling Diamonds Glimmer Paper, that has been punched with the Crop-A-Dile, and adhered with a Glue Dot.


For the card insert, Naturals White cardstock has been corner rounder, and negative detail created by using the “Hearts Border” Punch.
Soft Suede cardstock I then stamped with a feather form the “Four Feathers” stamp set in Versamark, and heat set with Gold Stampin’ Emboss Powder.
The “Bird Builder” Punch is then used to punch a bird with the feather lying along the bottom of the bird.
The finishing touch is the anchor, which is created by making a negative detail by punching a small hole with the Crop-A-Dile, so that the Soft Suede cardstock shows through the hole. 
Wah-lah ... Textured Card W/ "Hello Love" Stamp Set done! 


Project 2 Pop-Up Christmas Card With Snow Globe


The idea for the card came from a photo of cards that I spotted by Paula Dobson from “Stampinantics”, on her Facebook page, I changed it up more than a little, adding the pop-up on the card insert, and changing the Snow Globe scene.


The cardbase for this card is Whisper White, with an overlay of Whisper White. The overlay has been scored along the outer edges with the Simply Scored Scoring Tool.
The sentiment “Happy Wonderful Christmas” is from the “Wondrous Wreath” stamp set, and coloured using Stampin’ Write Makers in Early Espresso and Real Red.
The Snow Globe is stamped on a separate piece of Whisper White cardstock with Black StazOn, and coloured using a Sponge Dauber in Soft Sky, and Stampin’ Write Markers in Crumb Cake, Pumpkin Pie and Real Red.


I made up several samples so the ladies could see by just changing the position of the 2 ½” Circle Punch, it can change the whole scene of the Snow Globe.
Position the 2 ½” Circle Punch, and punch the scene that you prefer.
Dazzling Diamonds Stampin’ Glitter is added for effect, along the tree trunks, the snow, and on the snow man/person.
A small snowflake from the “Frosted Sequins” is added before the Window Sheet is adhered with Crystal Effects.
Adding the Window Sheet is the very last thing to be done, once the card has been fully completed, as the card needs to dry flat, as the Window Sheet can move.
The base of the Snow Globe is created by punching 2x “Word Window” in Crumb Cake.
A Basic Metal Button or Vintage Faceted Designer Button has been added to the bottom corner of the card to anchor it, and is tied with either White Bakers Twine or Early Espresso Bakers Twine.


The card insert is a full lining of Whisper White, with the pop-out being created by punching 2x “Word Window” punches along the crease line.
A small house from the “Holiday Home” stamp set has been stamped in StazOn Black, and coloured using Aqua Painters with Soft Sky and Crumb Cake, and the Real Red Stampin’ Marker, and cut using the “Homemade Holiday” Framelits.
The little trees are also from the “Holiday Home” stamp set, and stamped in Pear Pizzazz and fussy cut.
The sentiment “from our home to yours at christmastime” is from the “Holiday Home” stamp set and stamped in Real Red.
The second sentiment “May happy moments & cherished memories surround you with joy this season” is from the “Wondrous Wreath” stamp set and is stamped in Early Espresso.


A little snow man/person is stamped at the lower right hand corner, and is coloured with Stampin’ Makers in Pumpkin Pie and Real Red, which anchors the card nicely.
Wah-lah … Pop-Up Christmas Card With Snow Globe done!

And here here are my other two samples that I made up ...


Thanks for taking the time to stop by, and if you would like to make a Stampin’ Up! purchase online, please head on over  to my Stampin’ Up! website.

Happy craftin’,
Kathe.

p.s. gotta say ... "White Christmas" is still my fav Christmas/Holiday stamp set for this year!

#CreateWithKathe #JorjaRoseFiles


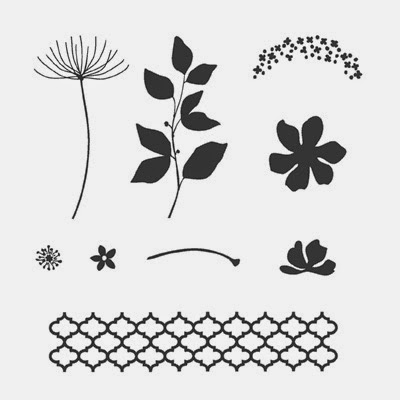
“Four Feathers” Stamp set and matching "Feathers" Framelits


“Hello Love” Hostess Stamp Set


“Holiday Home” Stamp Set


“White Christmas” Stamp Set


“Wondrous Wreath” Stamp Set

Recipe Ingredient List
Stamp Sets : “Four Feathers”, “Hello Love”, “Holiday Home”, “White Christmas” and “Wondrous Wreath”
Ink : Black StazOn, Early Espresso, Pear Pizzazz , Real Red, Soft Sky, Soft Suede, Versamark
Stampin’ Markers : Crumb Cake, Early Espresso, Pumpkin Pie and Real Red
Cardstock :  Crumb Cake, Glimmer Paper in Dazzling Diamonds, Naturals White, Soft Suede, Whisper White, Window Sheets,
Punches : “2 ½’ Circle”, “Bird Builder”, “Hearts Border”, “Project Life Corner Rounder”,  “Word Window”
Framelits/Dies : Homemade Holiday, Large Scallop, Top Note, Word Bubble,
Ribbons : Bakers Twine in White and Early Espresso, Burlap, Natural Chevron
Xtras : Basic Metal Buttons, Construction Tape, Glue Dots, Dimensionals, Frosted Sequins, Sponge Dauber, Stampin’ Emboss Powder in Gold, Tea Lace Paper Doily, Vintage Designer Button,

Special Tools : Crop-A-Dile, Heat Tool, Paper Trimmer, Simply Scored Scoring Tool, Stampin’ Scrub and Stampin’ Cleaner, Stampin Trimmer,

Monday 29 September 2014

“Create With Kathe” For Thursday 25th September 2014


This weeks “Create With Kathe“ Craft Class was all about shades of Gray, along with utilizing products from the Weekly Deals.
Our first project featured the “On Film” Framelits, and a gorgeous bird that has been heat embossed in Silver, with a feather from the “Four Feathers” stamp set, then punched using the Bird Builder Punch, love this effect!
The second project was a fancy fold Z card, featuring the “Window Frames Collection” Framelits, along with the “Bloom With Hope” stamp set.
This layout/sketch is a case via Stephanie David, entitled “For The Birds”.

Project 1 Shades Of Gray Card


The card base for this card is Smokey Slate, which as been embossed with the “Honeycomb” Textured Embossing Folder, and the corners rounded with the Project Life Corner Punch.
The sentiment “Thinking Of You” is from the “Everyday Occasions Card Making Kit” and had been heat embossed in Silver on Vellum, then backed with Basic Gray cardstock, and cut with the “Project Life Cards & Labels” Framelits. Two small Mini Brads secure the Vellum to the Basic Gray cardstock, which is then adhered to the card with Dimensionals.
For the film strip, Basic Black cardstock is cut wit the “On Film” Framelits, it is then backed with Whisper White cardstock to give a dramatic effect.
Basic Gray cardstock has been heat embossed in Silver, with a feather from the “Four Feathers” stamp set, then punched using the Bird Builder Punch, love this effect!
A paper Doily is placed behind the film strip, and a small Heart added, featuring the Dazzling Diamonds Glimmer Paper, which is punched using the “Itty Bitty Accents Punch Pack”.
The finished film strip is then adhered with Dimesnionals.
Some White Bakers Twine is tied around the card and looped through a Basic Metal Button, and tied with a bow.


For the inside of the card, I kept ii simple with a Heart in Dazzling Diamonds Glimmer Paper in the upper right hand corner, and along the base of the card, heat embossed in Silver is the cute flower border from the Photopolymer  stamp set "Bordering Blooms" + the corners are rounded with the Project Life Corner punch.
Wah-lah … Shades Of Gray Card done!

Project 2 “Window Frames” Z Fold Card


This card was a quick and easy project, as it is all about layering.
Whisper White cardstock is folded in half, then folded back to form a Z fold.
Smokey Slate cardstock is layered with Designer Series Paper "All Is Calm", which gives a nice subtle effect.
Three Pearl Basic Jewels have been coloured with the Daffodil Delight Blendabilities and added to the top left hand corner, which has also been repeated on the bottom right hand corner of the larger panel.
For the Window, there are three layers, first in Smokey Slate, which has been pieced using the “Festive Paper Piecing” guide, and the Paper-Piercing Tool and the Stampin’ Pierce Mat.


The second layer in Whisper White is plain {no embellishments}.
The third layer, also in Whisper White, is stamped with the “Bloom With Hope” stamp set in Black StazOn, then coloured with the Aqua Painters in Daffodil Delight, Melon Mambo, Strawberry Slush and a small coloured Pearl Basic Jewel is added to the centre of each flower. The stems have been coloured using the Old Olive Stampin’ Write Marker.
The Window Panel is then adhered with tape/glue on one side of the Z fold, to overlap onto the insert part of the card.
For the card insert, layer Smokey Slate with Whisper White cardstock.
Add the sentiment “Happy Birthday” or “With Sympathy” also from the “Bloom With Hope” stamp set.


The final touch are three little Pearl Basic Jewels, which have been coloured with the Daffodil Delight Blendabilities, and added to the right hand corner of the card insert, which anchors the projects, and finishes the card of nicely.
Wah-lah … Window Frames” Z Fold Card done!

Thanks for taking the time to stop by, and if you would like to make a Stampin' Up! purchase online, please head on over to my Stampin’ Up! website.

Happy craftin’,
Kathe.

“Bloom with Hope” Stamp Set


"Bordering Blooms" Photopolymer Stamp Set


“Four Feathers” Stamp Set


“On Film” Framelits


“Project Life Cards & Labels” Framelits


“Window Frames Collection” Framelits

Recipe Ingredient List
Stamp Sets : “Bloom with Hope”, "Bordering Blooms", stamp from the “Everyday Occasions Card Making Kit”, “Four Feathers”
 Ink : Black StazOn, Daffodil Delight, Melon Mambo, Strawberry Slush, Versamark
Stampin’ Write Markers : Old Olive
Blendabilities : Daffodil Delight
Cardstock :  Basic Black, Basic Gray, Designer Series Paper "All Is Calm", Glimmer Paper in “Dazzling Diamonds”, Smokey Slate, Vellum, Whisper White,
Punches : Bird Builder, “Itty Bitty Accents Punch Pack”, Project Life Corner
Textured Impressions Embossing Folder : Honeycomb
Framelits/Dies/Thinlits : “On Film” Framelits, “Project Life Cards & Labels” Framelits, “Window Frames Collection” Framelits
Ribbons : Bakers Twine in White
Xtras : Aqua Painters, Basic Metal Button, Dimensionals, Doilys, “Festive Paper Piecing” guide, Mini Brads, Paper-Piercing Tool, Silver Stampin’ Emboss Powder , Pearl Basic Jewels, Stampin’ Pierce Mat

Special Tools : Big Shot, Heat Tool, Magnetic Platform, Stampin’ Scrub and Stampin’ Cleaner, Stampin Trimmer, StazOn Cleaner

#CreateWithKathe #JorjaRoseFiles

Tuesday 9 September 2014

Vintage Love …

I had to break out some of my Vintage Stampin’ Up! products, as I had a very special card to make ...


I love to shop at Jacqui e, as they have beautiful garments at really good prices, so when my favourite “V Neck Ruffle Cardi” came up on special, in my fav colour Chartreuse, I just had to buy a “Back Up” Cardi!
EVERY time I wear this gorgeous colour, I get so many favourable comments.
My local store had sold out of my size, but the Dunedin store had one in my size, as well as one in Black, so I ordered both.
I made “Thank You” cards for both shop Managers, as they went out of their way to help me ship the Cardi’s back to sunny Nelson.
I love the message "Thank You For Your Kindness" from the "Wetlands" stamp set, as it is perfect for this card + this sentiment fits perfectly within a "Feathers" Framelits.


AND I also found some vintage dress patterned paper, which I made envelopes from ..


Wah-lah ... Vintage Dress Up Thank You Card done!


"Four Feathers" Stamp Set and matching "Feathers" Framelits


{Vintage} “It’s A Girl Thing” Stamp Set 


“Summer Silhouettes” Stamp Set


"Wetlands” Stamp Set

Recipe Ingredient List
Stamp Sets : "Four Feathers", {Vintage} “It’s A Girl Thing”, “Summer Silhouettes”, "Wetlands”
Ink : Black StazOn, Versamark
Cardstock : Blushing Bride, Naturals White, Strawberry Slush, Soft Suede, {Vintage} Designer Series Paper “Beau Chateau”, Designer Series Paper Stack All Abloom, Vellum,
Punches : Scalloped Tag Topper
Framelits: {Vintage} Dress Up, Feathers
Xtras : Candy Dots, Embossing Powder in White, Pearl Basic Jewels, Taffeta Ribbon 1/8" in Melon Mambo, Venetian Crochet Trim,

Special Tools : Big Shot, Heat Tool, Stampin’ Scrub and Stampin’ Cleaner, Stampin’ Trimmer


#CreateWithKathe #JorjaRoseFiles

Friday 29 August 2014

“Create With Kathe” For Thursday 21st August 2014


This past week was all about the gorgeous and versatile “Kinda Eclectic” stamp set, and the Scallop Tag Topper Punch.
We made two projects, the first a Gift Holder, which contains a small greeting card and cellophaned Lip Balm, the second project is a Greeting Card with a fancy closing {made wit the Scallop Tag Topper Punch}, and has many details ...
The ladies got to choose between two of the new “In Colours”, Blackberry Bliss or Lost Lagoon …


Project 1 Gift Holder + Git Card + Lip Balm
This is a case via my good friend Ruth, however I altered the measurements and added the Scallop Tag Topper closing + Lip Balm Holder, and card.
Naturals White cardstock forms the base of the Gift Holder.
Please see diagram …


Cut cardstock 7” x 11 1/2”
Along the 7” length, score at 2 ½” in on both sides, which leaves a 2” panel in the middle.
Along the 11 ½” length, score at 4 ¾” and 6 ¾”
At the 4 ¾” and 6 ¾” score marks, measure 2 ½ “ along the crease line, draw a diagonal line to the fold, cut of all shaded areas.
Once the shaded areas are cut away, measure ½” along the 11 ½ “ length and cut the sides off.
You will be left with a long slim piece of cardstock with what looks like wings on either side.
Crease along the scored lines.
Stamp on one side, at both ends, where the Scallop Tag Topper will be punched.


Flip the cardstock over and stamp the Wings.


First stamp the leaves with the “Kinda Eclectic” stamp set in Crumb Cake, once dry, stamp over and just to the side {to give a shadow effect} with either Blackberry Bliss or Lost Lagoon.
Fold the Wings inwards, and turn the cardstock inside out, the “Wings” then become the pockets, in which the gift card is placed.


A cute little card slips into the pocket, with some butterflies added for special effect.
Hanging in the middle of the Tag Tops is a cellophane bag which contains a Lip Balm.


Ribbon is threaded through the Tag Tops and tied.
Wah-lah … Gift Holder + Git Card + Lip Balm done!

Project 2 Scallop Tag Topper Greeting Card


The cardbase is Naturals White, and has accents of Blackberry Bliss or Lost Lagoon. Designer Series Paper Stack in the corresponding colour is also used.
Stamp sets featured are “Bloom with Hope”, “Four Feathers”, “Hardwood”, and “Six-Sided Sampler”.

This card features many xtra details like the two toned feather, white embossed feathers, negative detail via the Hearts Border Punch, Vintage Faceted Designer Buttons that have been coloured with the Blendabilities, Crystals Effects Dots that have been coloured with the Blendabilities, and Aqua Painted flowers.
Wah-lah … Scallop Tag Topper Greeting Card done!


Phew!!! 
This Class should have been 2 hours, but it actually took 3 hours, but all the effort was worth it!


Recipe Ingredient List
Stamp Sets: “Bloom with Hope”, “For All Things”, “Four Feathers”, “Hardwood”, “Kinda Eclectic”, and “Six-Sided Sampler”.
Ink:  Blackberry Bliss, Crumb Cake, Lost Lagoon, Sahara Sand, Black StazOn
Blendabilities: Coastal Cabana, Rich Razzleberry
Cardstock:  Blackberry Bliss, Lost Lagoon, Naturals White, Whisper White, Designers Series Paper Stack in Blackberry Bliss and Lost Lagoon + Vellum
Punches: Bitty Butterfly, Corner, Elegant Butterfly, Hearts Border, Hexagon, Scallop Tag Topper,
Framelits/Dies: Four Feathers, Hexagon Hive
Xtras: Cellophane Bags, Crystal Effects, Dimensionals, Embossing Powder in White, Linen Thread, Rhinestone Basic Jewels, Stitched Satin Ribbon, Tombow Multipurpose Glue, Venetian Crochet Trim,  Vintage Faceted Designer Buttons, oh and a Lip Balm!

Special Tools: Big Shot, Heat Tool, Magnetic Platform, Stampin’ Scrub and Stampin’ Cleaner, Stampin’ Trimmer, StazOn Cleaner


Related Posts Plugin for WordPress, Blogger...
Pin It
Blogger Wordpress Gadgets