Cotton Butterfly

Free background from VintageMadeForYou
Showing posts with label Bird Builder. Show all posts

Monday 28 April 2014

Commission: Horse Themed Card

I had the great honour in making a birthday card today, for a friend’s friend … does that make sense?!!!


The brief was that Lynley loved her horses named Harry and Scotty, and I was given these photos to work from ...


Harry


Harry


Scotty

I decided to use the photos of Harry and Scotty jumping, and create them as “Wall Hangings” or pictures on the inside of the card.
The beautiful headshot of Harry is on the front of the card.
My girl-friend Linda was rapt with the card, and I am really pleased as to how it turned out ...


Recipe Ingredient List
Stamp Sets: “Gorgeous Grunge”, “Hardwood”, “Perfect Pennants”,  
Ink: Sahara Sand, Soft Suede, and Stampin’ Markers Early Espresso and Pacific Point
Cardstock: Baked Brown Sugar, Crumb Cake, Naturals White, Natural Composition Specialty, “Fan Fair” DSP {My Digital Studio Download}
Punches: “Banner”, “Bird Builder”, “Petite Petals”
Framelits/Dies: “Circle Card” Thinlits, “Finishing Touches” Edgelits
Xtras: Antique Brads, Burlap, Dimensionals, Embossing Powder > Clear, Heat Tool, Pearl Basic Jewels, Vellum, Vintage Trinkets


Special Tools: Big Shot, Big Shot Magnetic Platform, Envelope Punch Board, Stampin’ Scrub and Stampin’ Cleaner, Stampin’ Trimmer 

Sunday 27 April 2014

Envelope Scrapbook Album > Child's Version

Yesterday we celebrated my niece’s birthday, and I just had to make her a sweet little “Envelope Scrapbook Album”, with the help of my new Zutter!!!
The colour theme just had to be Purple, as this is her favourite colour.
I even wore a purple Clarity dress to her party!


The Album cardstock is available on Clearance Rack at the moment and is called “Cheerful Treat” Designer Paper Series.


Because she was turning just 7 years old, I wanted to create a child-like card, that she could easily maker herself; hence the Cupcake Builder Punch is used, and backed onto Purple Glimmers Paper.


Inside the card, I stamped the words “Hooray For Today” which is also on her Album, but this time I added googly eyes, instead of Brads.


Inside the Album pockets, I tucked in lots of punched shapes, such as Hearts, Cupcakes, Birds and Butterflies, using a variety of my Stampin’ Up! Punches – please see below for a list of all Punches used.


Included in her gift a packet of “Note Cards and Envelopes” #131527.
So now she can make her own cards with the xtra cute punch-outs.

Wah lah child’s version of a “Envelope Scrapbook Album” done!


Happy Birthday Jasmin!

To see my other Post regarding Envelope Scrapbook Albums, please click here


“Cheerful Treat” Designer Series Paper, 
retired but available on the Clearance Rack


“Note Cards and Envelopes” #131527

Recipe Ingredient List
Stamp Sets: “Geometrical”
Ink: Sahara Sand, and Stampin’ Markers and Early Espresso and Elegant Eggplant
Cardstock: Coastal Cabana, Crumb Cake, Naturals White, Natural Composition Specialty, Strawberry Slushy, and 
Punches: “Bird Builder”, “Corner”, “Cupcake Builder”, “Heart”, “Small Heart”, “Scallop Tag Topper” “Scallop”,
Embossing Folders: “Honeycomb”, Needlepoint Border”
Framelits/Dies: “Chalk Talk” Framelits, “Finishing Touches” Edgelits, “Beautiful Wings” Embosslits
Xtras: Bakers Twine, Chevron Ribbon, DImensionals, Googly Eyes, Ruffle Stretch Ribbon, Purple Glimmer Paper {out-sourced}, Purple Jewelled Brads {out-sourced}


Special Tools: Big Shot, Big Shot Magnetic Platform, Envelope Punch Board, Stampin’ Scrub and Stampin’ Cleaner, Stampin’ Trimmer and of course the “Zutter”!!!

Sunday 20 April 2014

Happy Easter …

Well ... we are now in the tail end of Cyclone Ita, and the Easter Bunny was able to make it through all that rain and wind to deliver chocolate goodies across the region!


Image via http://blogs.discovermagazine.com/

I stayed up late adding the final touches to Reilly and JorjaRose’s Easter treats.
The little Easter Boxes were case’d via Jacque Williams, but altered.
I changed the circle to a heart, and added personal tags to each Box.


#1 and #3 Jacque's version, #2 and #4 by Kathe

Easter Treat Box
To make the Treat Boxes, start with cardstock 6”x8 ½”.
Score at 2”, 4”, 6”, 8”
Turn 90 degrees, score at 2”


Cut the Circle or Heart using Punches or Framelits, I used the Heart from the “Hearts Collection” Framelits. I saved the cut out Heart for the Tag.
Assemble the Box and add the treats, for the closing add a 2”x 2 ½” piece of coordinating cardstock, use the Scalloped Tag Topper Punch to add fancy edges at both ends,


                              Inside "JorjaRose's Easter Treat Chest"

Tape or Glue one edge to the box so that the child can get easy access to their treats. Close the box, punch 2 holes using the Crop-A-Dile, and add some decorative ribbon.

                              
                                 "JorjaRose's Easter Treat Chest"

The Tag is made with the cut-out Heart, a second Heart cut from the “Hearts A Flutter” Framelits, and an initial is cut using the “Typeset Alphabet Bigz” dies, and then layered on Dimensionals, and tied with Bakers Twine.


Inside "Reilly's Easter Treat Chest"

The little chicks are made using the Bird Builder Punch, and then re-punching to “dock” their tails. Sponge with Daffodil Delight, the Small Heart Punch is used to create the cute little wing, which is then dipped in Dazzling Diamonds, and attached using Dimensionals.
 
                                 
                                    "Reilly's Easter Treat Chest"

The kiddies were xtra lucky this year, as they each got 2x Treat Boxes, as well as a Metal Case {which they can reuse to house their marbles, cars, barbies etc.} containing  8 hollow Easter Eggs, AND a Chocolate Maltesers Easter Bunny!!!


omg soooo yummy Maltesers Easter Bunny!!!

When I grow up, just sayin’ I am going to spoil my grandchildren{s}!!!
From one set of grandparents, the kids received a single hollow Easter Egg, and from the other set of grandparents, a hologram placemat.
Just sayin’ …

These Treat Gift Boxes can be made for any occasion, think Girlfriends, Wedding Favours, Party Favours, etc.

To view my other post on how to make an xtra cute Punch Art Easter Treat Box, please click here ...


"Punch Art Easter Treat Box"


Nursery Nest” DSP, retired but available on the Clearance Rack


Scalloped Tag Topper Punch


“Hearts A flutter” Framelits


 “Hearts Collection” Framelits

Recipe Ingredient List
Cardstock: Daffodil Delight, Old Olive, Pool Party, “Nursery Nest” DSP, retired but available on the Clearance Rack
Ink: Daffodil Delight
Punches: Scalloped Tag Topper, Bird Builder, Small Heart
Framelits/Dies: “Hearts Collection”, “Hearts A flutter” Framelits
Xtras: Bakers Twine, Dazzling Diamonds, DImensionals, Two Way Glue Pen, Stitched Satin Ribbon in Midnight Muse and Primrose Petals


Special Tools: Big Shot, Big Shot Magnetic Platform, Crop-A-Dile, Simply Scored Scoring Tool {or use the Stampin’ Trimmer}, Stampin’ Scrub and Stampin’ Cleaner, Stampin’ Trimmer 

Monday 17 February 2014

“Card In A Box - Flowers”


After seeing numerous versions of the gorgeous “Card In A Box” card, I had to give it a go!
I found a really informative tutorial by Tina Weller aka "The Serene Stamper" on Pinterest. 
Tutorial by Tina Weller aka "The Serene Stamper"

Once assembled, the box is then designed to lay flat to allow for posting.

For the colour theme, I decided on two gorgeous colours Melon Mambo and Calypso Coral, with hints of buttery Daffodil Delight.


On Tina’s Tutorial, she used 2 strips across the middle of the box to adhere the flowers to, but I used 3 strips {or beams}.


Not to confuse you further … instead of using strips of cardstock to adhere the flowers to, I chose to use thick clear plastic, re-purposed from the packaging on ink cartridges.
As you can see from the undercarriage of the box, I adhered the plastic strips to the cardboard “beams”, once adhered; I then cut off the excess plastic.


The flowers are stamped from the “Flower Shop” stamp set, and layered between Dimensionals.
For the centre of the flowers, I stamped in Daffodil Delight a small stamp from the “Hello, Lovely” stamp set, onto Daffodil Delight cardstock, punched from the “Boho Blossom” Punch.

On the reverse side of the box, I stamped the words “You can never have too much happy” from the “Yippee-Skippee!” stamp set, with Melon Mambo and Calypso Coral Stampin’ Markers.
As the box can be folded flat, the back panel leaves room for a special message for the lucky recipient.


For the birds, I punched one complete bird from the “Bird Builder” punch, and then punched a second wing, that sat behind the bird, to make it look as though they were flying.


This card was a great way of using up scraps, as you can see from the list or papers I used!

I really enjoyed making my first “Card In A Box”, and am making another version tomorrow, so watch this space …

“Epic Day This and That” DSP
“Soho Subway” DSP
“Tea For Two” DSP, also available on My Digital Studio

“Flower Shop”

“Chalk Talk”
“Hello, Lovely”
Yippee-Skippee!”


 "Beautiful Wings" Embosslits

Recipe Ingredient List

Stamp Sets: “Chalk Talk”, “Flower Shop”, “Hello, Lovely”, “Yippee-Skippee!”
Ink:  Melon Mambo, Calypso Coral, and Daffodil Delight, with Melon Mambo and Calypso Coral Stampin’ Markers.
Cardstock: Naturals White, Old Olive, “Epic Day This and That” DSP, “Soho Subway” DSP, “Tea For Two” DSP, also available on My Digital Studio
Punches: Bird Builder, Boho Blossom, Corner, Pansy
Framelits/Dies: Beautiful Wings Embosslits, Chalk Talk Framelits,
Xtras: Black Rhinestones for the bird eyes, recycled plastic packaging, Stampin’ Dimensionals

Special Tools: Big Shot, Stampin’ Scrub and Stampin’ Cleaner, Stampin’ Trimmer

Saturday 25 January 2014

3 Sisters, 3 Cards ...

I designed this card back in December for one of my “Create With Kathe” craft classes.
Originally I made it with the “Bermuda Bay” and “Coastal Cabana”, but having 3 birthdays this month, all sisters, I made it is 3 different colour combos.
 
For my Auntie Dawn (my Mom’s twin sister), whose favourite colour is purple, I made it in “Wisteria Wonder” and “Concord Crush” ...


For my Auntie Janne (my Mom’s younger sister), who loves bright colours, I used “Calypso Coral” and “Tangerine Tango” ...


And for my Mom, she received the gorgeous “Bermuda Bay” and “Coastal Cabana” card …


As a wee treat, each of my Auntie's were also given a gorgeous "Lindt Excellence Passion Fruit Intense" block of chocolate with yummy pieces of Almonds ... mmmmmmmm!!!


"Chalk Talk"
Bundle Set includes matching Framelits
#132730 Clear Mount $81.50
#132731 Wood Mound $96.75
OR Stamp Set Only:
#130634 Clear Mount $43.95
#130631 Wood Mount $54.95


“Flower Shop”
Bundle Set (with matching Pansy Punch)
#132726 Clear Mount Bundle $64.50
#132727 Wood Mount Bundle $72.95
OR Stamp Set Only:
#130942 Clear Mount $39.95
#130939 Wood Mount $49.95


“Mixed Bunch”
#125537 Clear Mount $46.95
#128442 Wood Mount $58.95


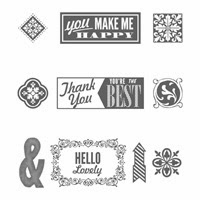
“Hello, Lovely”
#130243 Clear Mount $54.95
#130240 Wood Mount $68.95

“Swallowtail”
#129216 Clear Mount $29.95
#131943 Wood Mount $37.95


"Pretty Print Textured Impressions" Embossing Folder
#132175 $16.95

Recipe Ingredient List
Stamp Sets: “Chalk Talk”, Flower Shop”, “Hello, Lovely”, “Mixed Bunch” and “Swallowtail”
Ink: “Bermuda Bay” and “Coastal Cabana”, “Wisteria Wonder” and “Concord Crush”, “Calypso Coral” and “Tangerine Tango”, “Crumb Cake” and “Baked Brown Sugar”
Framelits: Chalk Talk Framelits,
Punch: Bird Builder, Pansy, Blossom
Embossing Folder: “Pretty Print Textured Impressions"
 
Special Tools: Big Shot, Candy Dots Brad Bases, Rhinestone Basic Jewels, Stampin’ Dimensionals, Stampin’ Trimmer
Related Posts Plugin for WordPress, Blogger...
Pin It
Blogger Wordpress Gadgets